In part 1 of this blog series, I talked about the reasoning behind my decision to build a Plex server out of a refurbished Dell PowerEdge R710 server. In this second part, I will cover the process of getting the OS and GPU installed.
Installing the Operating System
The Dell PowerEdge R710 server that I bought came with a built-in “iDRAC” NIC management card, which despite the name, has nothing to do with vampires. It’s actually a separate solid-state computer that pipes the video output from the main server into this auxiliary card over serial, so that you can remotely access the server over your network. You can even watch it POST and get into the BIOS because the iDRAC (Integrated Dell Remote Access Controller) is actually a separate computer. It’s just like being physically at the terminal!
The iDRAC has a web interface which is similar to the admin interface you get for configuring a router or other network device, you just hit the IP address of the iDRAC (which has its own ethernet jack), via a web browser. From there, you can view various statistics of the machine’s uptime, hardware health, CPU utilization, etc. The main thing for my purposes was the remote console.
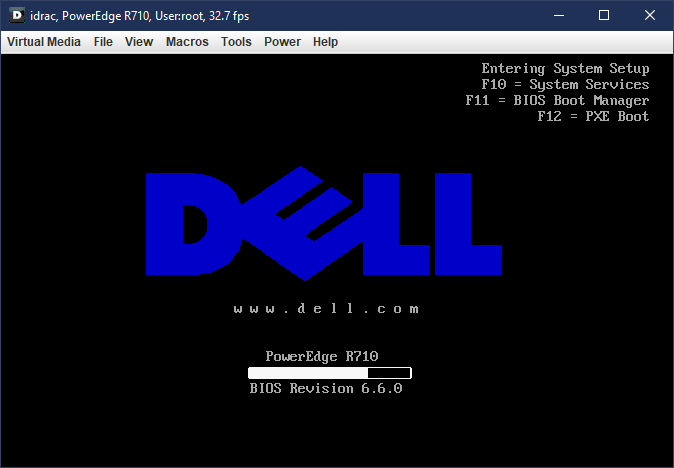
I had to install an old version of the Java Runtime Enviroment in order to get the remote console to connect, it seems the newer versions have stricter security policies which block the iDRAC. Which is unfortunate (and the iDRAC was running a fully updated firmware which was released in 2019, so age is really no excuse here). But, I was eventually able to get it to connect.
Since the PowerEdge has a RAID controller, you can’t just install Windows straight from a DVD as per usual, since Windows can’t see the drive volumes unless setup is started with the RAID drivers pre-loaded. To accommodate this, the server has a built-in system called Dell Lifecycle Controller which enables you to configure your RAID volumes and pre-load the OS install with the correct drivers so you can then proceed as usual.
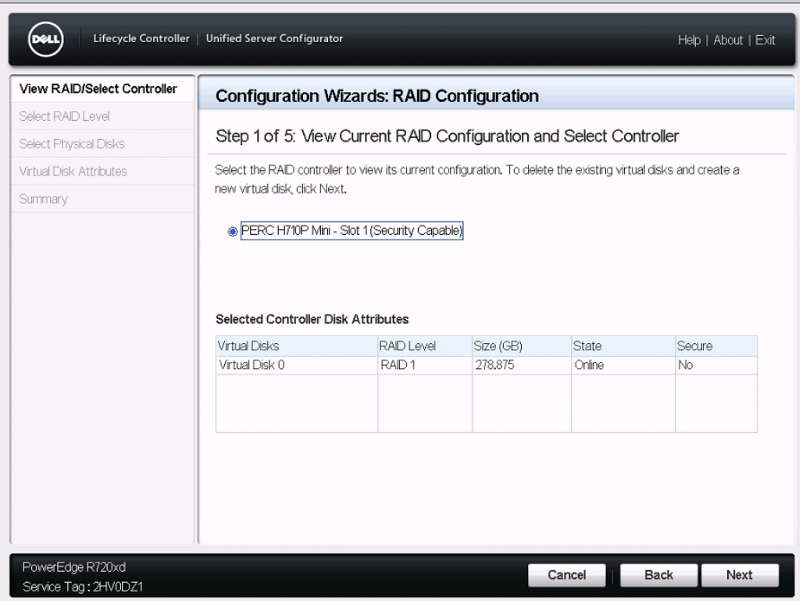
As I mentioned in Part 1, the machine I got has 12 TB of storage, which is actually 6 hard drives with 2TB of storage each. I configured them as a single RAID 6 volume, which means that there’s two drives worth of redundancy. So, up to two drives can fail simultaneously without losing any data (as long as I replace one of them before a third drive fails). Due to the redundancy, this leaves about 7.3 TB of usable space.
This seemed like a reasonable trade-off, relative to either less redundancy or less usable space. RAID 5 would leave 9.3 TB usable, but only allow for a single drive to fail at once, while RAID 0 would leave the full 12 TB usable, but without any redundancy. I felt that since this is a slightly older, refurbished machine, the extra redundancy was important.
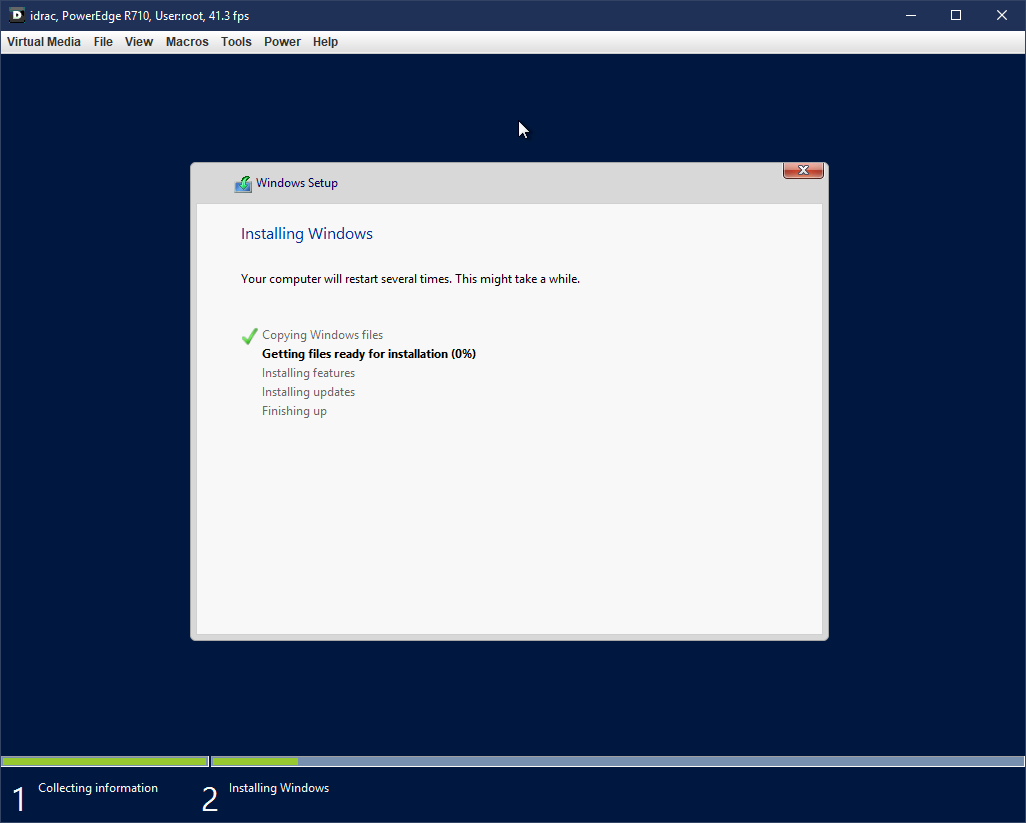
The R710 is a few years old now, so the most recent version of Windows Server it supported via the Lifecycle Controller system was 2016. So, I went and got an ISO of that version from MSDN and burned it to a DVD and I was off to the races.
One thing I wasn’t sure of since I’d never dealt with RAID before, was whether you can still partition the drive logically after creating a RAID volume. This is, indeed the case. Windows just sees the RAID volume as if it’s one giant hard drive, and you can partition it however you like just as if it was actually a single disk drive. I created a 100GB partition for the OS and programs, and left the rest as the “media” partition. That way I can always format and re-install the OS if I’m so inclined without losing any media.
Once Windows Server 2016 was installed, I was able to upgrade from there to Windows Server 2019 without any issues. Then it was just a matter of installing Plex and copying all my media over from my old machine onto the new server.
Installing the GPU - Here There Be Dragons
So, I had gotten this far without attempting to install a GPU, since the one I bought on eBay hadn’t arrived yet. I selected an NVidia GeForce GTX 1050 Ti after reviewing the Plex transcoding specs on this chart. It seemed like a reasonable price/performance trade-off.
The First Setback
When the GPU finally arrived and I went to install it, the problem became clear - although there was enough room for the GPU to fit in the designated PCIe slot within the case, I couldn’t plug it in.
Why? Because, although it hadn’t even occurred to me to check, the PCIe riser that came with the server splits the motherboard’s PCIe x16 slot (i.e. the full-width kind) into dual PCIe x8 slots (i.e. the half-width kind). What I had here was a square peg and a round hole. So, back to the drawing board.
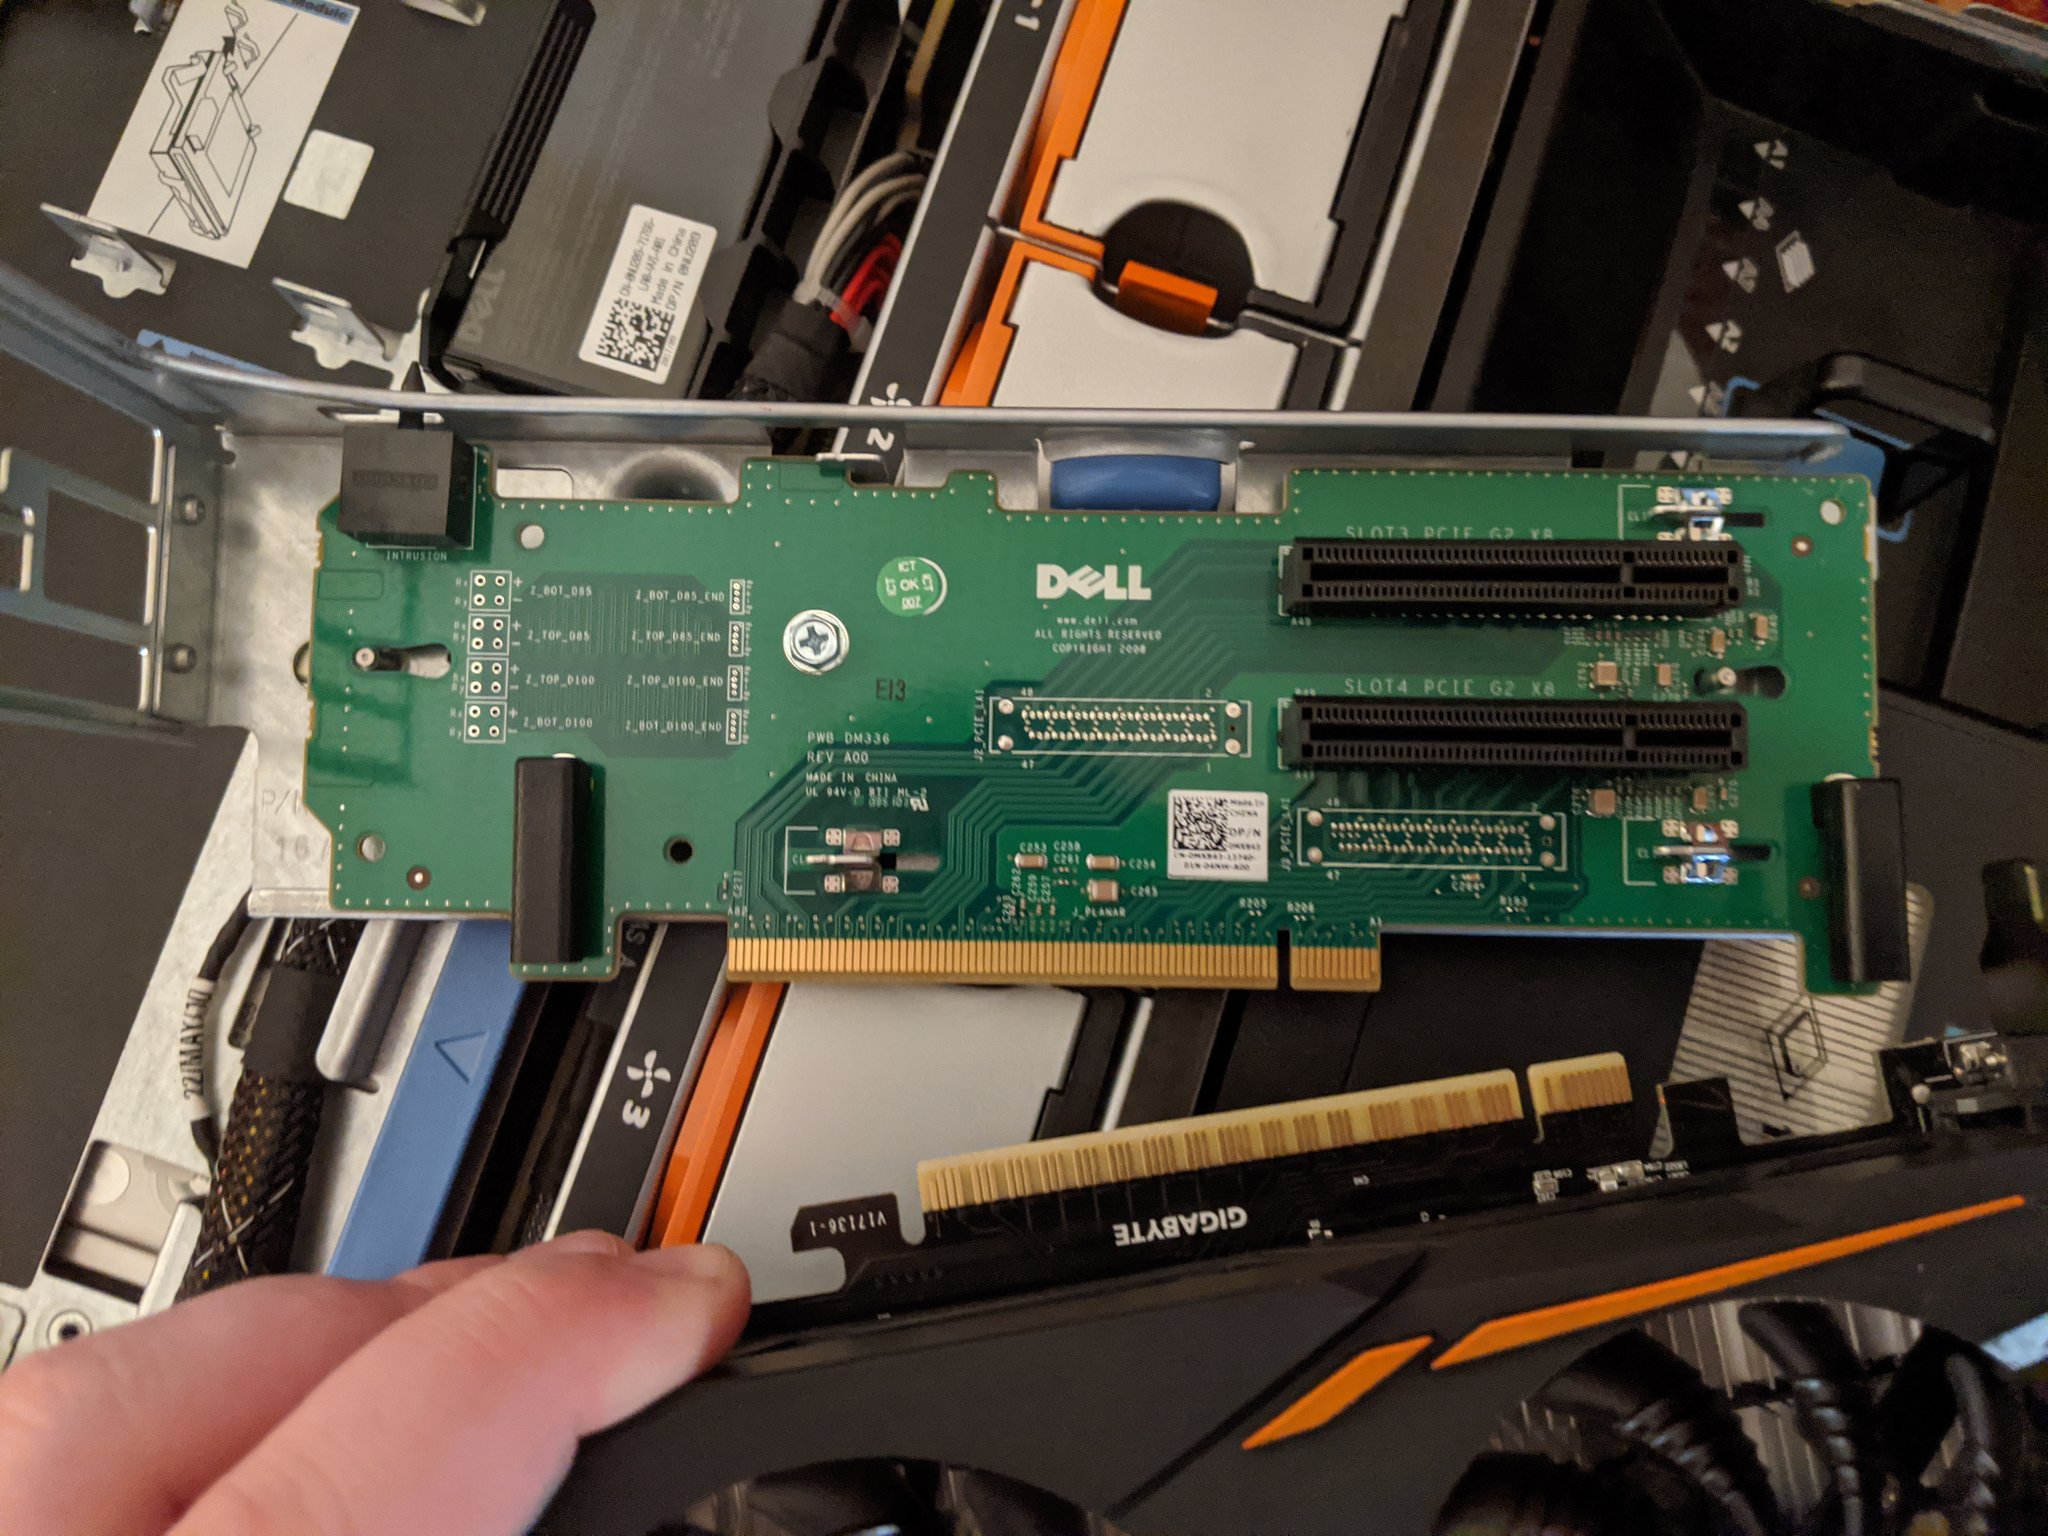
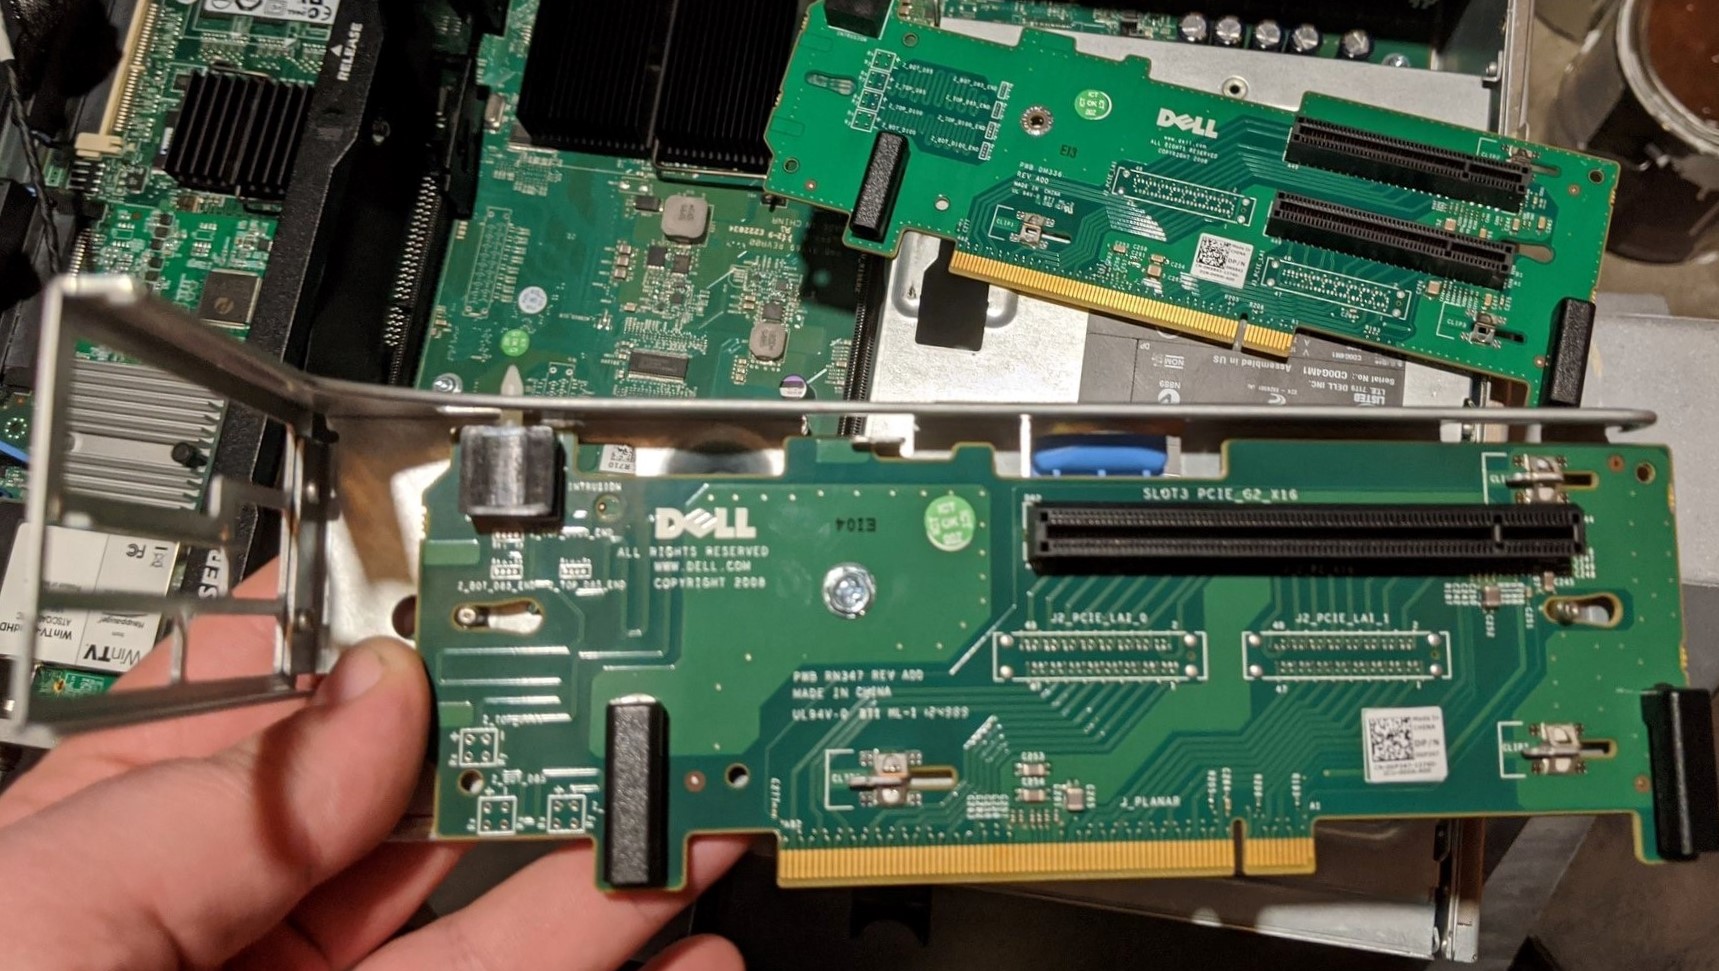
So it turns out that Dell makes two kind of risers for this model of server. The dual PCIe x8 kind, and one with a single PCIe x16 slot. Unfortunately, these don’t come cheap. This was the first major stumbling block of this project, as I ended up having to shell out nearly $200 for the right riser card that has a PCIe x16 slot so that I could use a modern GPU to assist with transcoding.
Doing some research, I found that you also can’t just run a ribbon cable directly from the motherboard, because the risers have special “security” leads that the motherboard checks for upon boot, and if it’s not present, the machine won’t POST. Basically this is hardware DRM preventing you from not using Dell’s special riser cards that are built specifically for this server. Bummer.
Ultimately, I felt it was worth it because the whole point of this project was to build a solid Plex server and hardware transcoding is definitely part of that, in my opinion. But it’s certainly an issue with using enterprise-grade hardware for a consumer project like this: if you’re not careful you end up needing specialty parts and they don’t come cheap. A fortune 500 company wouldn’t think anything of this extra $200 expense, but it was basically half the cost of the entire server so it took a big bite out of my “cheaper than a Synology DiskStation” argument. Caveat emptor and all that.
The Second Setback
So, now that I had the PCIe x16 riser, all should be right with the world, right? I was excited to finally get the GPU, which had been sitting in a drawer encased in its static-free bag for weeks now, installed.
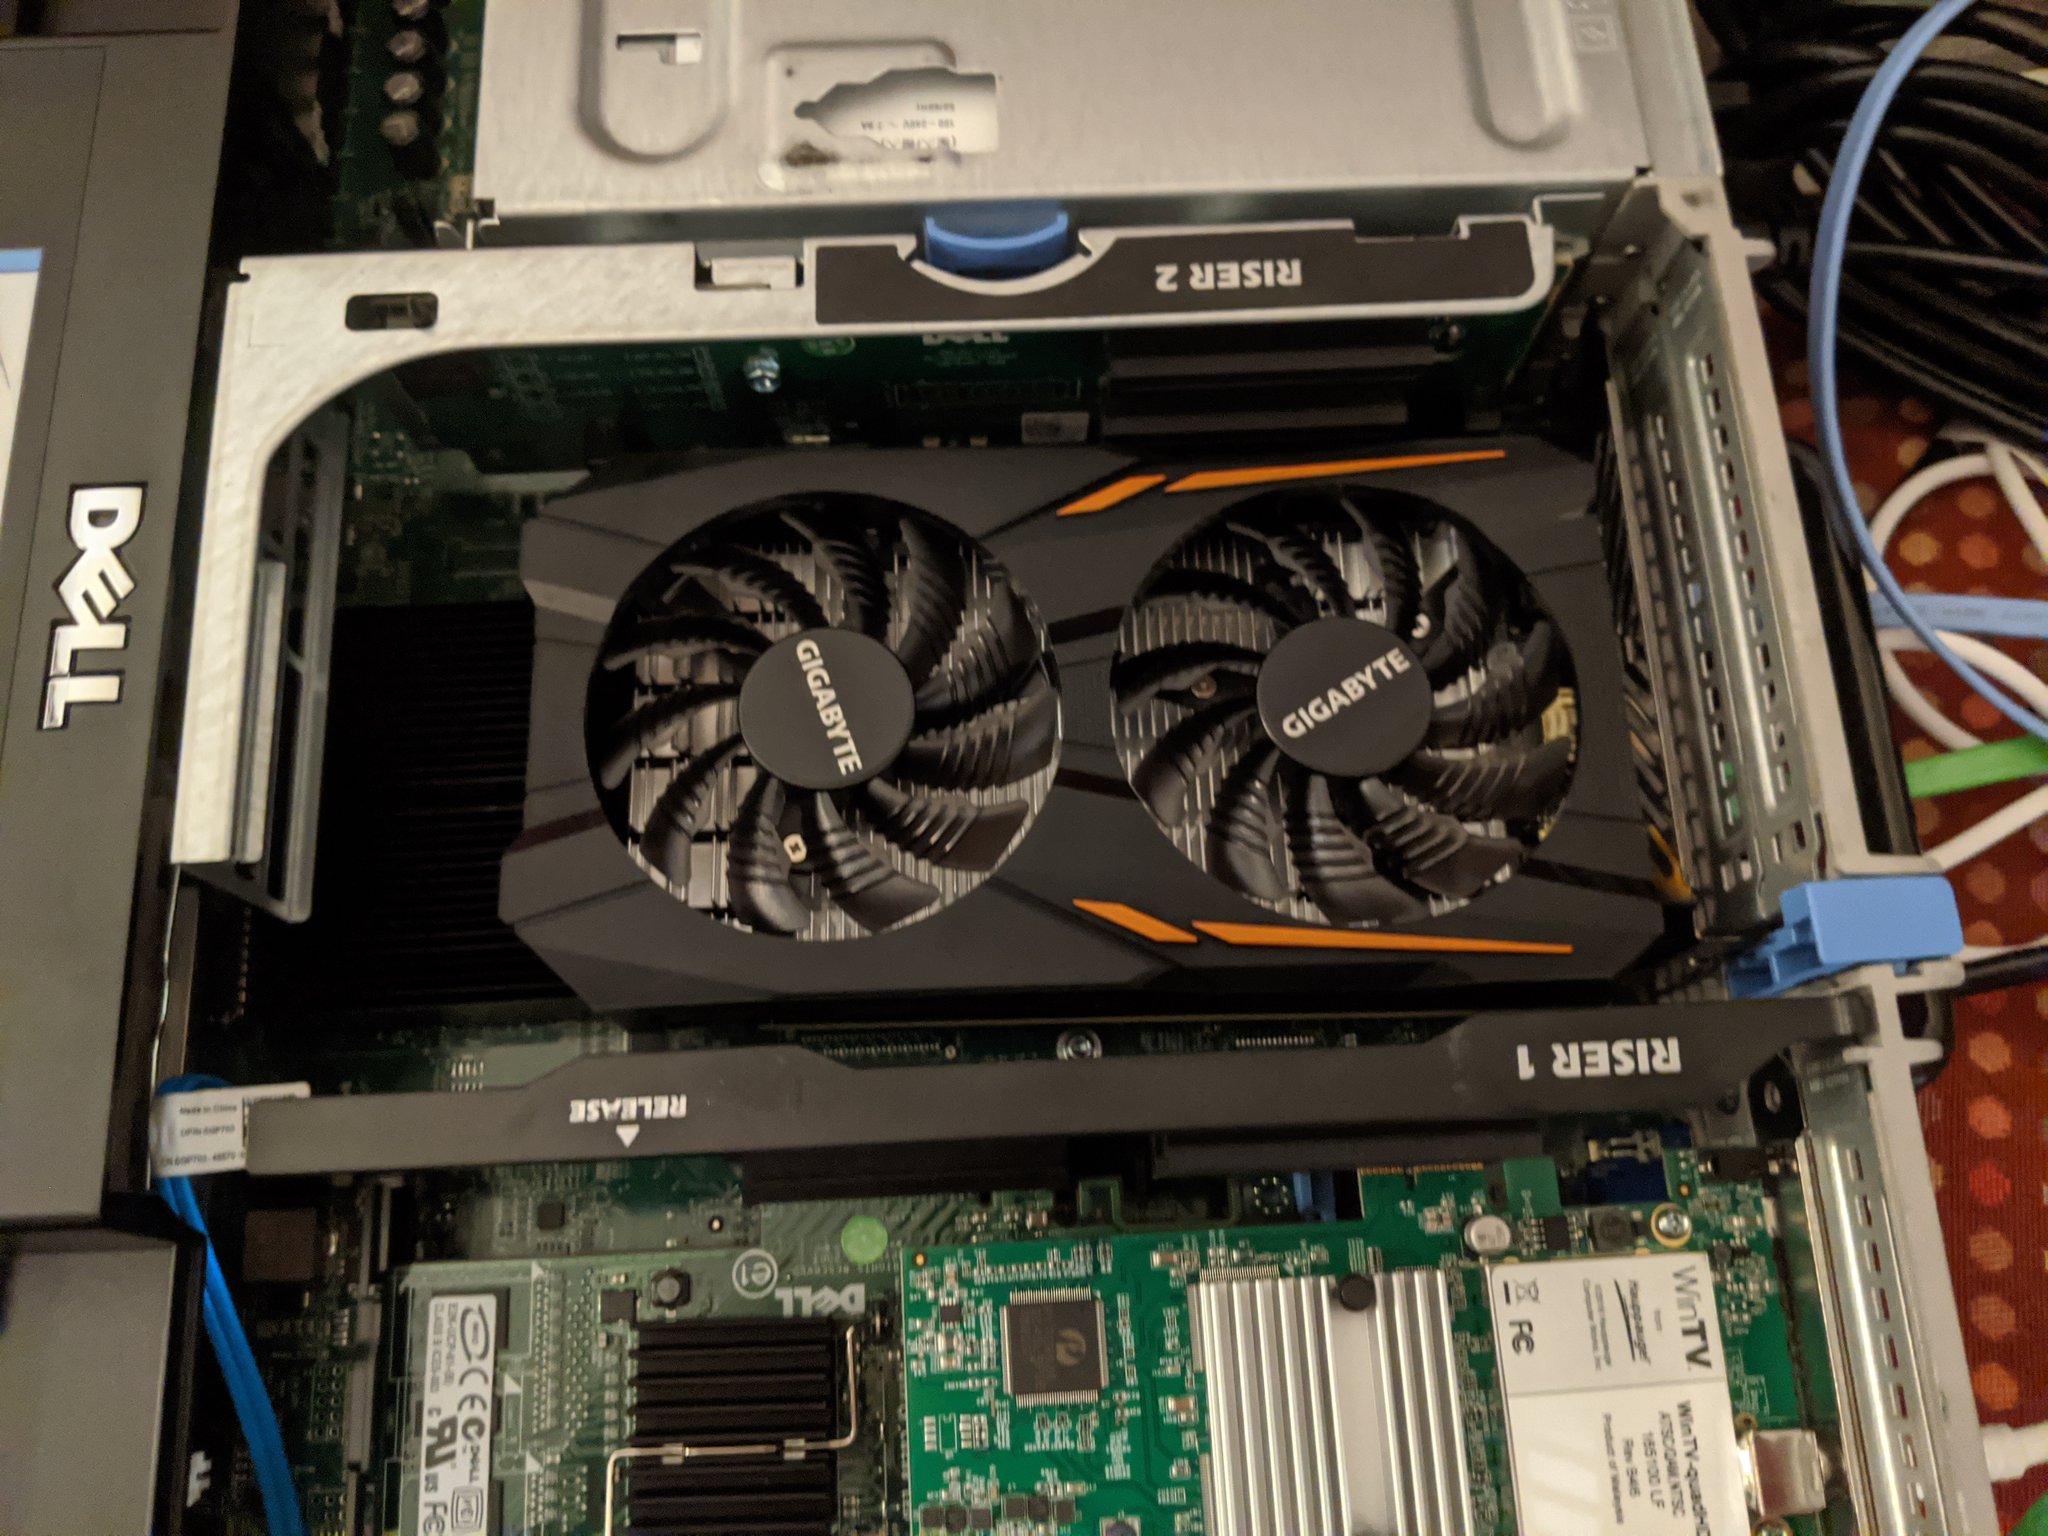
When I got the machine opened back up, another roadblock revealed itself. The GeForce GTX 1050 Ti I picked out was of the “two-slot” variety of GPU, meaning it takes up two expansion slots of space in the computer’s chassis.
I thought this would be all well and good, since the R710 has two slots open on each side of the two PCIe riser spots in the case. But, due to the way the PCIe x16 riser is oriented, the PCI card actually sits “upside-down” from how they would be positioned in a normal ATX type PC tower case.
If you go back and look at the PCI x16 riser above, you can see that the slot is positioned at the top of the card, not in the middle. Since the card is upside-down, this effectively limits you to “single slot” cards, otherwise the heatsink and fans would extend out the top of the server’s case, obstructing where the cover needs to go.
This is unfortunate, since there’s really no reason that I can see why the PCIe x16 riser couldn’t have had the single slot positioned in the middle so that you could use two-slot cards.
I toyed with the idea of rigging up some combination of a PCIe x16 ribbon cable and some rubber stand-offs to enable using a two-slot card which would just rest in the space, but that seemed like it’d be janky because the card wouldn’t be installed securely.
I decided to go back to the drawing board and get a single-slot GPU to use instead of the 1050 Ti, which I would resell on eBay. The upshot of this is that I hadn’t noticed that all the “consumer level” GeForce cards have a driver-enforced “session limit” of 2 concurrent transcodes, which you can hit even if only a single person is streaming a video from your Plex server because things like overlaying subtitles count as their own “session.” Hat-tip to Scott Galloway for alerting me to this limitation.
I should note that you can find “cracked” drivers for NVidia’s consumer graphics cards that remove the transcode session limitation, but I kind of wanted this thing to be rock solid and that seemed like introducing a pretty big level of potential instability.
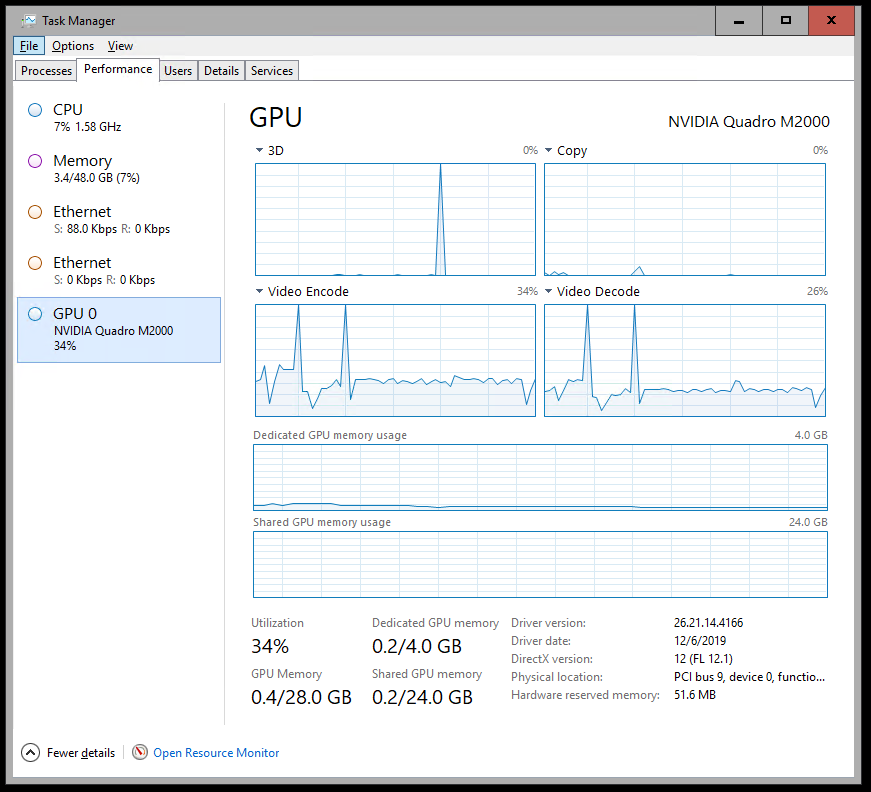
After pouring over some more benchmarks and doing price comparisons, I decided on a NVidia Quadro M2000, which is a single-slot card, and part of NVidia’s “workstation” line meant for professional video editing/computer graphics rendering, which does not have the session limitation.

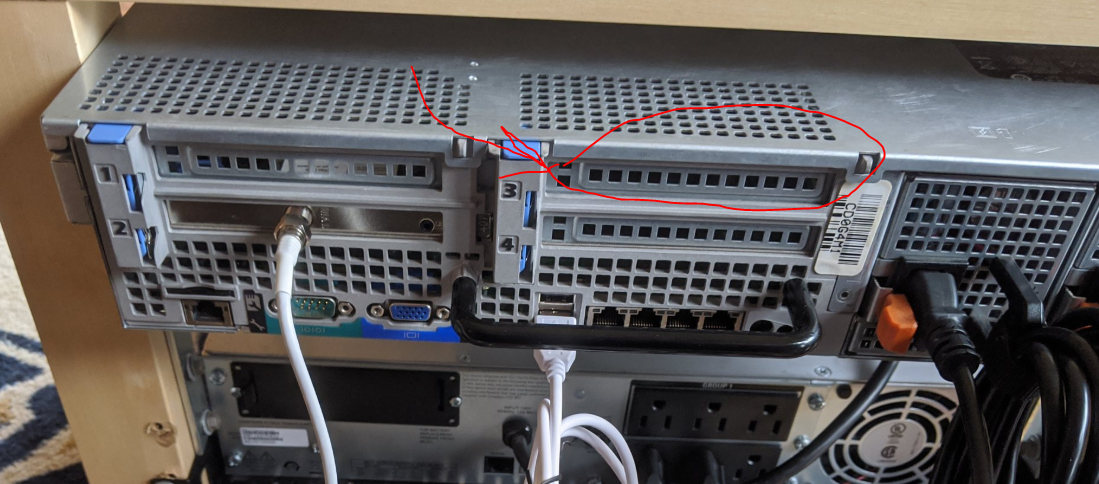
Fast forward a few days and I finally had my GPU installed and humming away in the server. After I installed the NVidia drivers, I remoted into the server and watched the Windows Task Manager’s Performance tab to make sure the hardware-assisted transcoding was working.
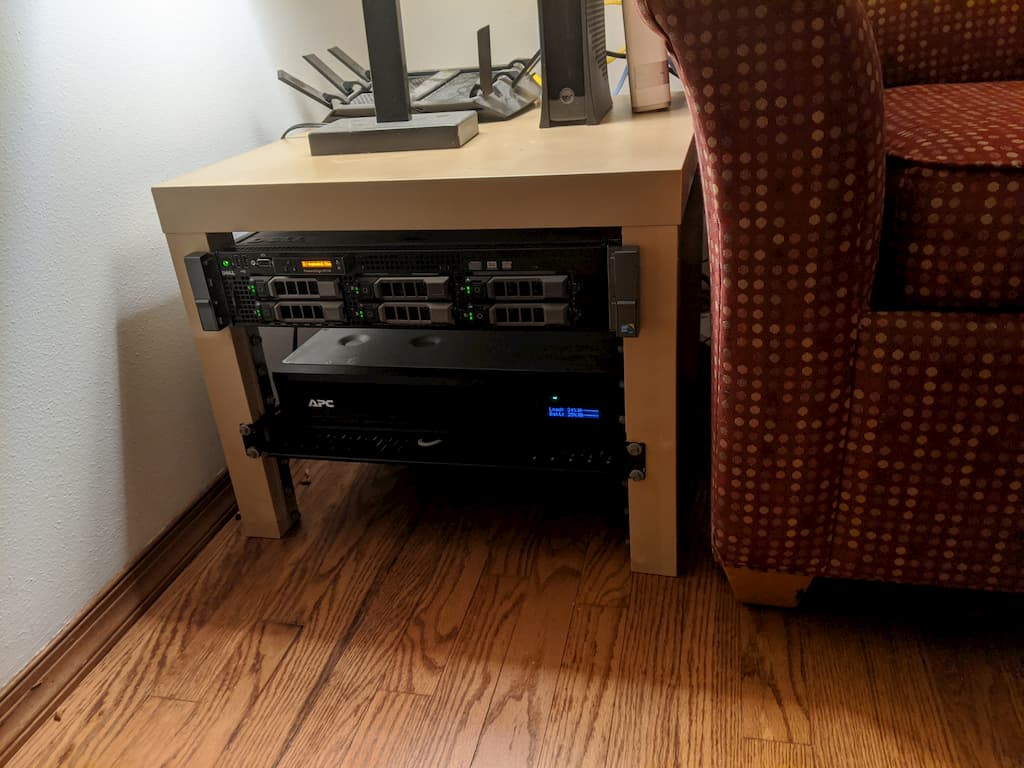
At long last, my LACK Rack Plex NAS was complete (say that 10 times fast). Here’s a complete cost breakdown:
- Dell PowerEdge R710 - $345
- Dual 870w Power Supplies (upgraded from 540w the server came with) - $30
- PCIe x16 Riser - $200
- NVidia Quadro M2000 GPU - $145
- Metal brackets, ethernet cables, etc. - $30
This brings the total cost to around $750. I already had the LACK table ($8) and TV Tuner card ($80).
I still think that’s a pretty good deal all things considered, especially for how much more powerful this box is compared to a Synology DiskStation, and since using the DVR capabilities with over-the-air TV via Plex is preventing me from paying for a cable TV subscription, so that’s a savings of about $100 a month. This thing pays for itself!
Final Thoughts
Would I recommend going this route for others? Depends on how comfortable you are dealing with low-level OEM utilities (iDRAC, Lifecycle Controller) and pricing out refurbished hardware on eBay.
It was definitely more of a hassle to get everything situated and set-up (over the course of about a month), compared to the hassle-free instant gratification of a plug-and-play specialty device.
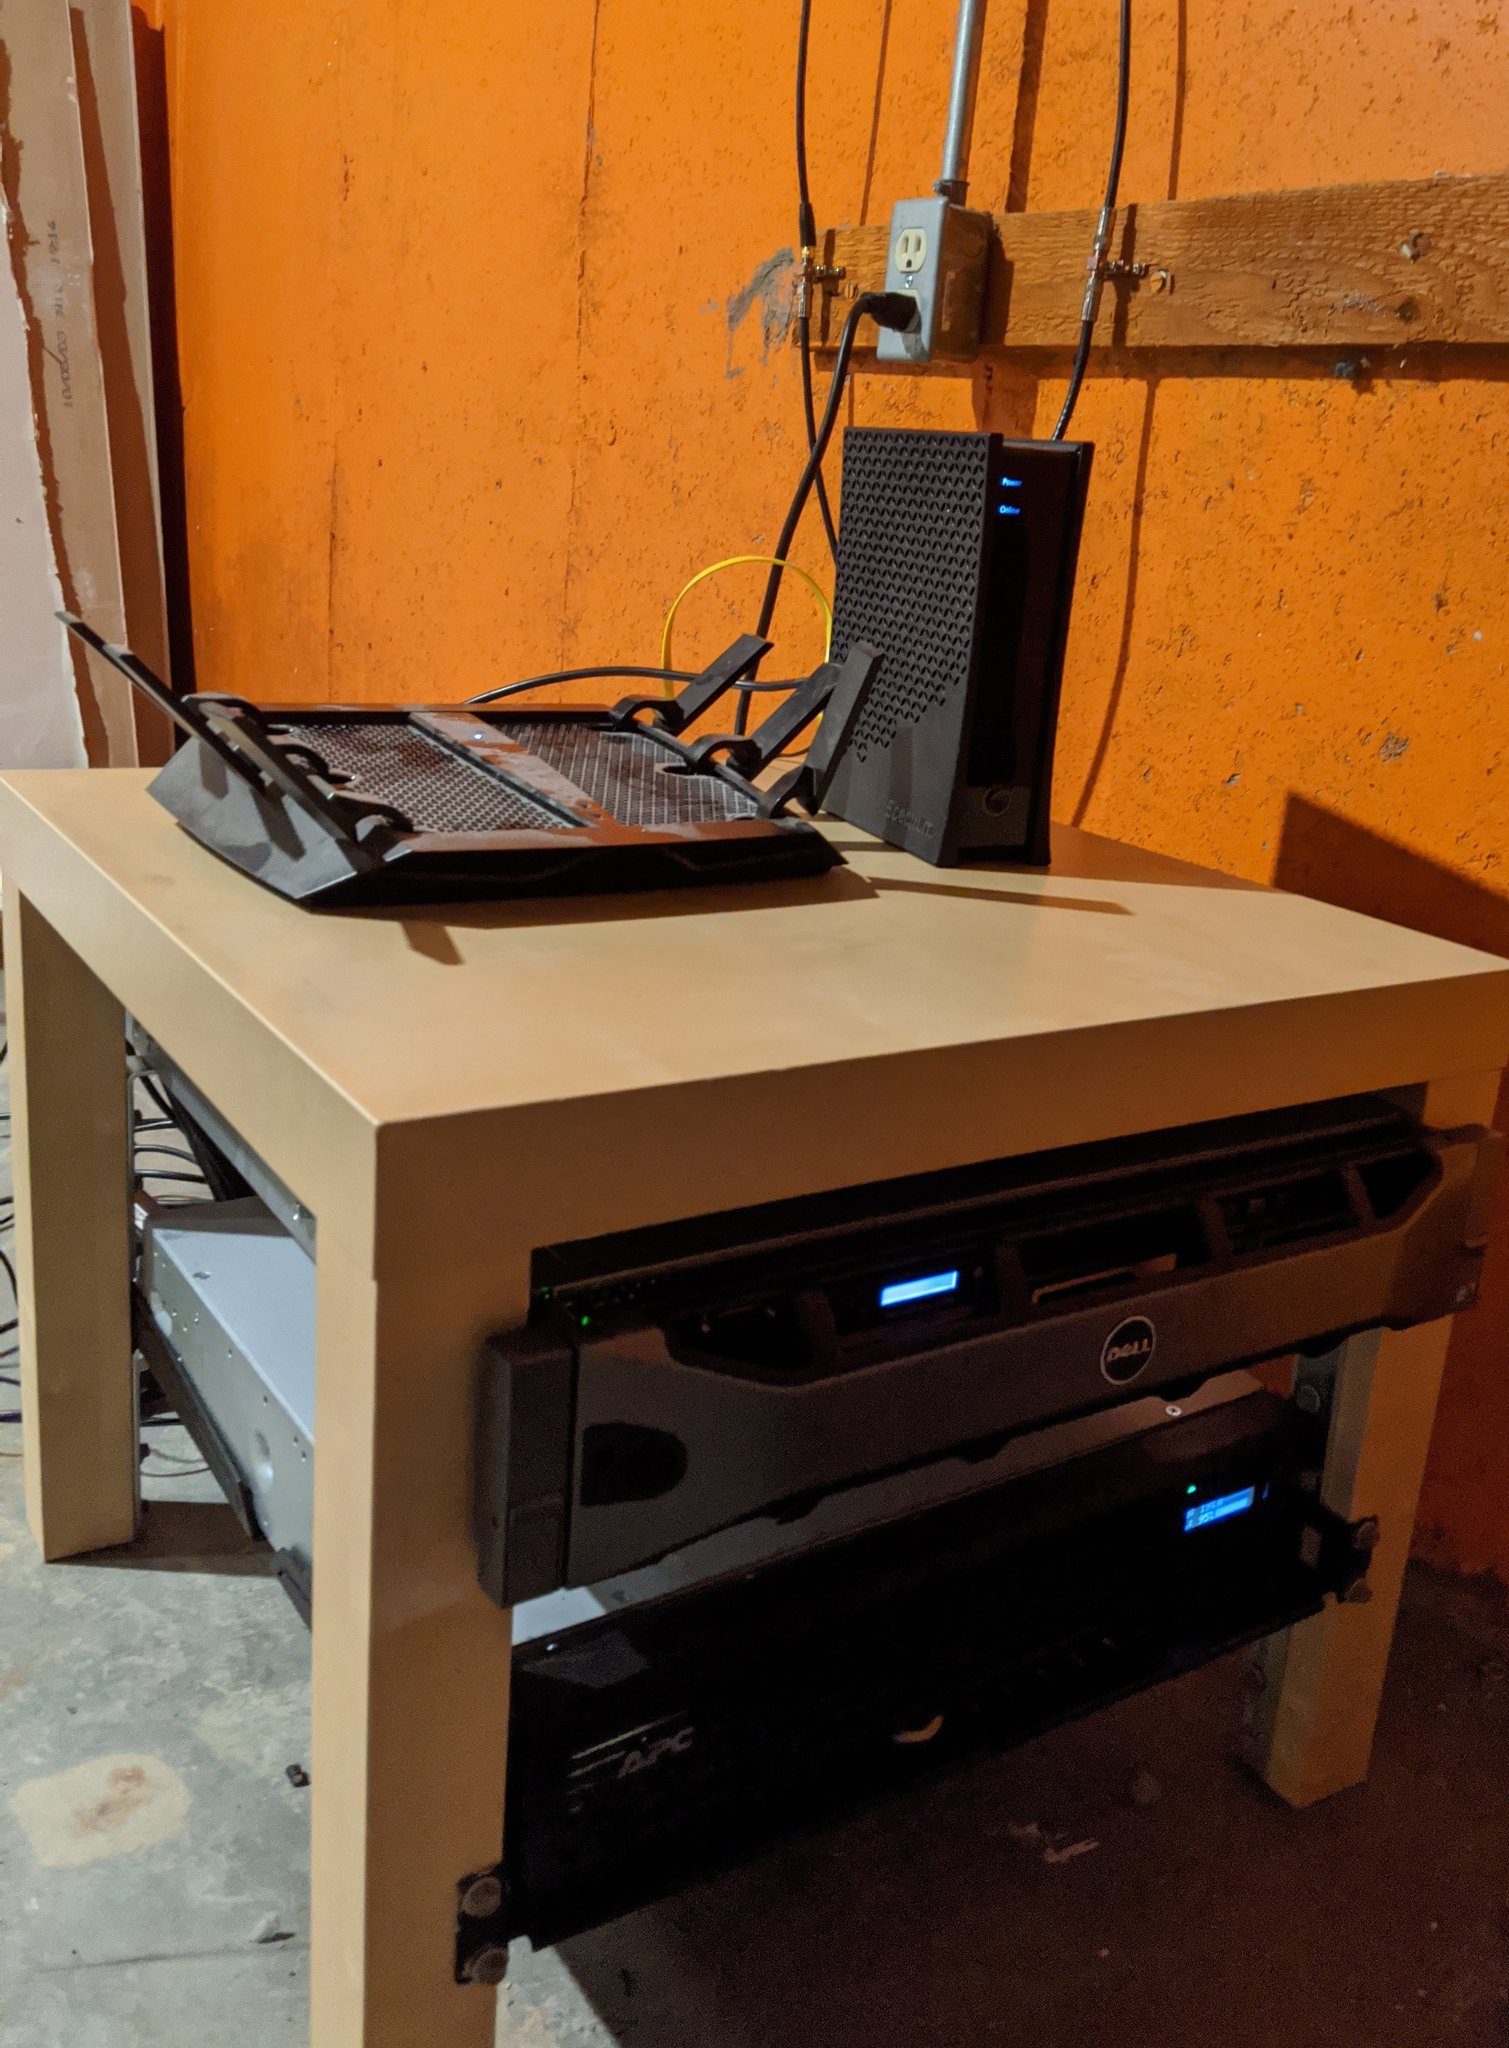
I should also note - the PowerEdge is decidedly not quiet. I had originally envisioned the LACK rack just sitting in the corner of our living room, where the LACK table had been sitting previously, but the high-pitched whine of the PowerEdge’s fans drove me to ultimately move the whole shebang down to the basement, which involved running new lines for the TV and internet coax cables, and that was another part of the project that I didn’t initially anticipate.
However, if you’re like me and the prospect of building something like this sounds like half the fun, then I’d definitely say go for it. I anticipate this being the primary driver of my home network and media, as well as our photo and video backup, for years to come.