Despite an overflowing number of options for hosting your own blog or website these days, I still feel like the best bang for your buck is GitHub Pages (if you’re a developer, that is). It’s free and does SSL and you can set it up to work with a custom domain name, something that’s a “premiere” option requiring paid service at most other blogging/website platforms.
So, I run this here site as a GitHub Pages site, and that’s all well and good. But, I also have a web server running in my basement (to host Plex media), so I figure it’s kind of silly to pay for Azure hosting or whatever to host various hobby projects. I should just use the server I’m already running, right?
Well, in order to do that, I wanted to set it up such that my server can respond to requests to my domain so I don’t have to keep telling people my ever-changing public IP address (I have Spectrum internet, and you can only get a static IP address with their “business” class of internet service, which I do not have).
Luckily, there are completely free ways to do all of this, the only thing I’m actually paying for aside from internet access through my ISP and power to run my server is ~$10 a year to host my domain at Namecheap.
Setting up the DNS Records
So, I don’t have a static IP, meaning my public IP address changes whenever Spectrum decides to issue a new IP address to my modem. The solution here is Dynamic DNS, which thankfully my domain name registrar supports, and my UniFi controller has a Dynamic DNS section where you can tell it to update your domain’s DNS records whenever your public IP changes. Nifty!
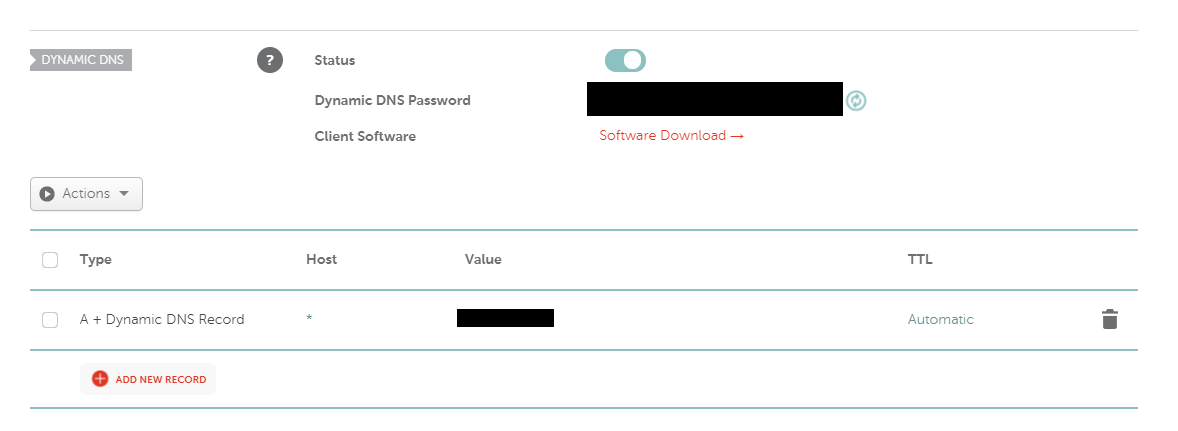
Registrar DNS Configuration
The first step is to log into my domain registrar and set up an “A+ Dynamic DNS Record” for my domain. I used a wildcard (*) for the host, because I wanted every subdomain that’s not explicitly configured otherwise (e.g. “www”, which goes to the GitHub Pages site) to resolve to my home web server.
Dynamic IP Configuration
Next, in the UniFi controller software, I went to Settings -> Advanced Features -> Advanced Controller Configuration -> Dynamic DNS and added the info using the helpfully pre-supplied “Namecheap” service and the password generated by Namecheap (blacked out in the screenshot above).
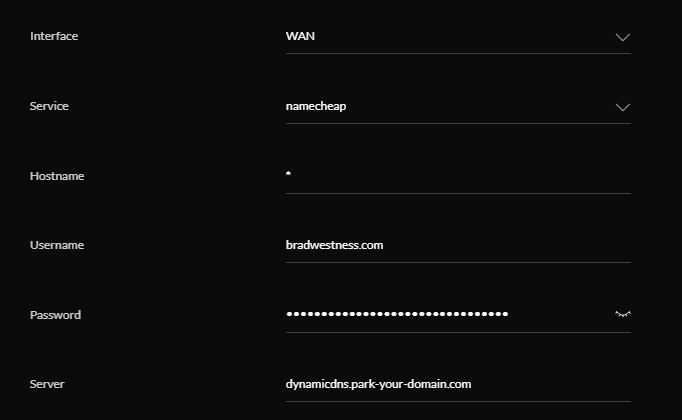
Since I’m forwarding all subdomains, I used the wildcard (*) here as well. This ensures that whenever my public IP address changes, my UniFi controller will automatically update the DNS settings for my domain at Namecheap with the new IP address, so everything will continue to resolve correctly. Neat!
If you’re not running UniFi, Namecheap does offer a standalone Dynamic IP client that will notify them when your IP changes as well. Just click the “Software Download” link in the Dynamic DNS section of their portal, as seen in the “Registrar DNS Configuration” section above.
Static Route
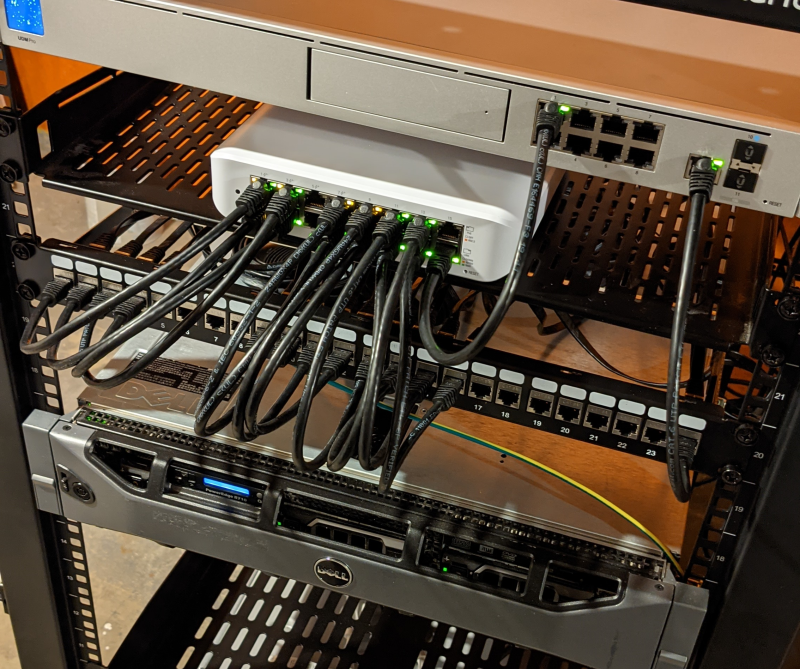
In order for traffic from the web to be routed to the right device on your network, you’ll want to ensure the device has a static (private) IP configured. I set up a NIC Team on my server (which has 4 NICs) and assigned the virtual NIC a static IP of 192.168.1.200.
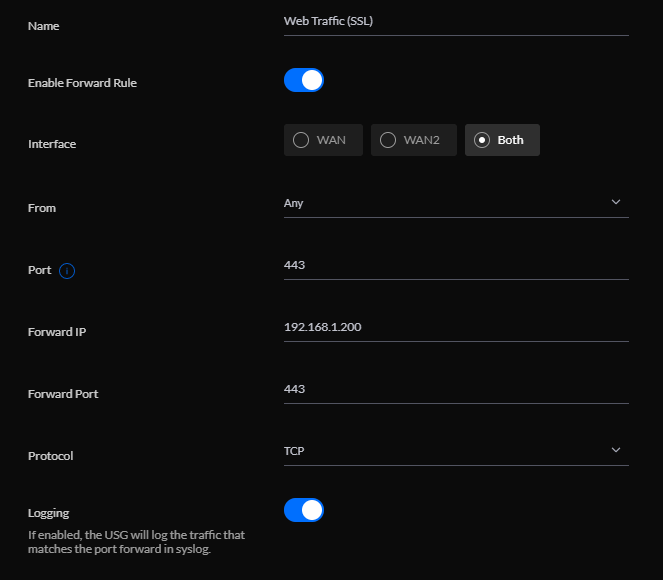
Then, in the UniFi controller software, I went to Settings -> Advanced Features -> Port Forwarding, and added forwarding rules for traffic on ports 80 and 443 (the default HTTP and HTTPS ports) to route to my web server’s internal IP address.
Even if you’re not using UniFi, almost all routers offer the ability to set up static routes in their admin panel, although it varies by make and model.
Web Server Configuration
Now, my router will send any HTTP traffic coming in over the web on either ports 80 or 443 to my web server. However, I still need to set up my server, running Windows Server 2019, to actually respond to that incoming traffic.
I ran into a bit of a snag here, and it took me a bit of trial and error to figure out what the issue was. After messing with firewall rules and going down various rabbit holes to no avail, here’s what worked: I had to run a netsh command on the server to tell it to listen to HTTP traffic on the IP address I configured previously.
Here’s what worked for me:
` netsh http add iplisten 192.168.1.200 `
Configuring IIS
So, with all that set up, I could hit any subdomain of my site (other than www.) and I’d get the default IIS landing page (since I hadn’t actually done anything beyond installing IIS on the server, yet). Success!
However, I also want to serve things over SSL with a valid cert so that people don’t get certificate errors and warnings if they’re trying to hit something I’m hosting. Let’s Encrypt will let you do that for free, too!
In order to generate my cert with Let’s Encrypt, I used win-acme, since I’m running on Windows Server. There’s an installer you can download, but I went the hipster .NET global tool route.
After installing .NET 5, I ran the following command from an admin prompt:
` dotnet tool install win-acme –global `
Once the tool is installed, you can just run wacs (again, from an admin prompt) to start working with Let’s Encrypt certificates.
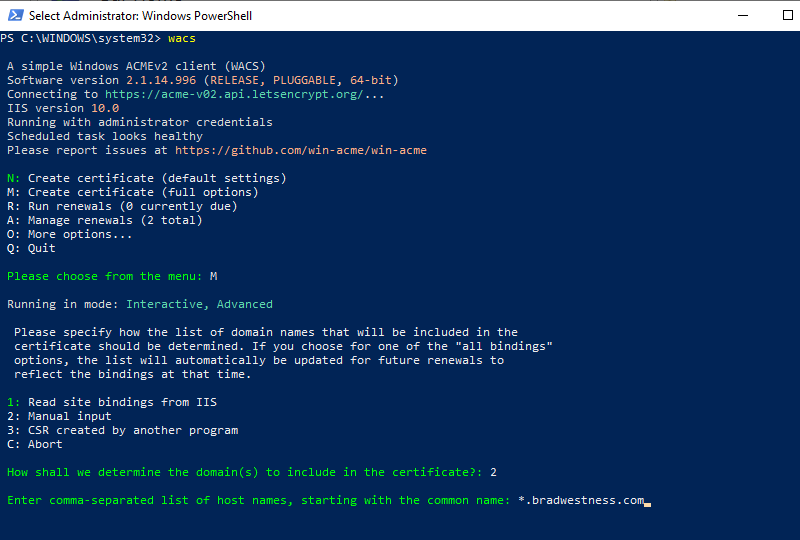
Win-Acme can read your IIS bindings and detect which sites to make certificates for you automatically, but I wanted to create a wildcard certificate, so I chose option M in the first prompt (full options) and option 2 in the second prompt (Manual input). At the “Enter host names” prompt, I entered my domain with a wildcard (*) subdomain prefix.
After you’ve got all your info set up, Win-Acme will walk you through a “challenge” which is to verify you actually own the domain you’re creating a certificate for.
I did the DNS challenge option, which involved creating a DNS TXT record with a certain text value, which was painless to do at the Namecheap portal. Once your ownership is verified, Win-Acme can automatically apply the cert to your IIS sites, and then you’re off to the races.
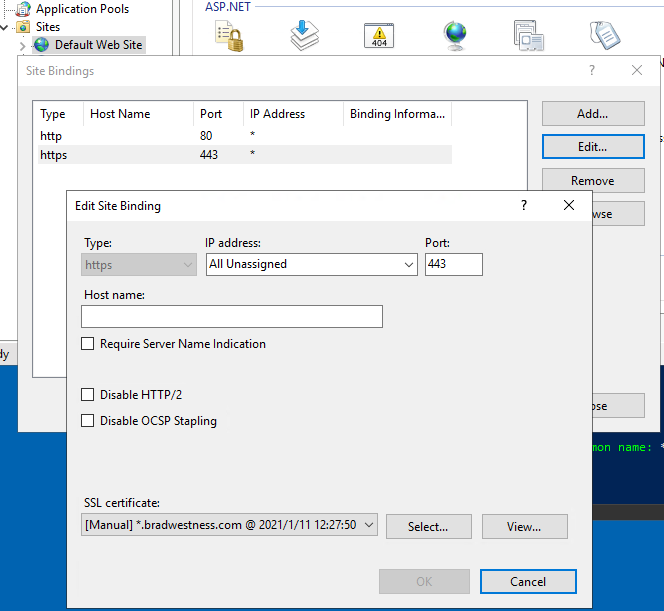
I have the “Default Website” set up in IIS to respond to any unhandled request regardless of hostname with a simple little “hello world” index.html page, and it uses the wildcard certificate for any HTTPS request.
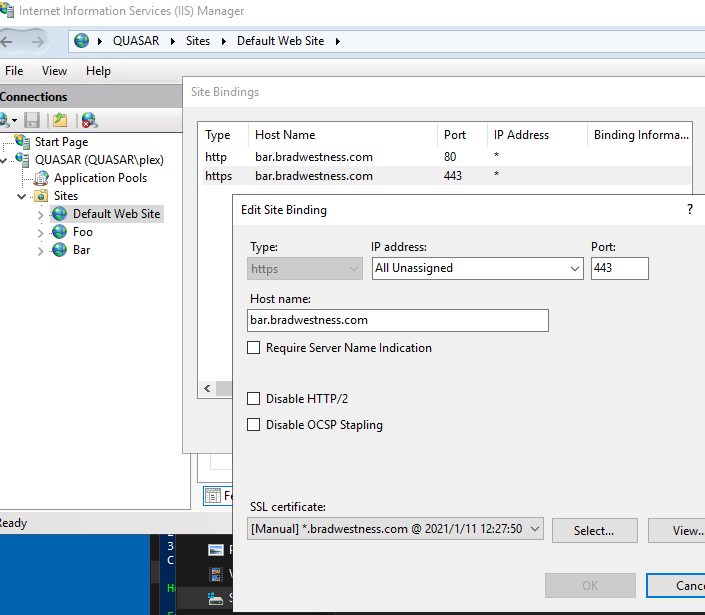
Individual Sites
Just to make sure everything was working properly via IIS, I set up a couple additional websites and bound them to specific domain names, but still using the same wildcard certificate as the default website. I set them up with different paths so they’ll each return a different static index.html page, for testing.
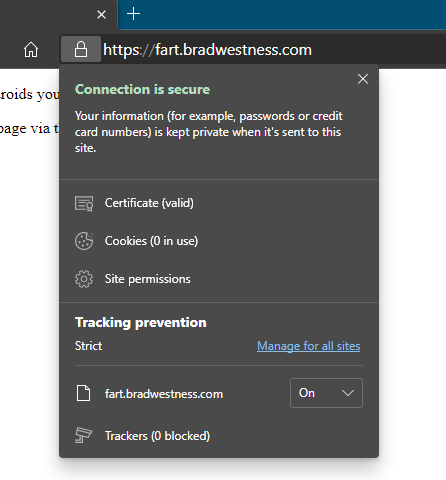
Success! I can now hit any arbitrary subdomain via HTTPS to my home server and it will respond with a valid SSL certificate. All for free!
You could even host a multi-tenant application federated by subdomain using this method and it’ll all just work.