
I’ve been working from home full time since March of 2020 (before that I was working from home two days a week for about a decade). Personally, I love not having to commute for half an hour just to sit at a computer somewhere else, along the flexibility being remote gives me to let the dog out, throw in a load of laundry over my lunch break, and pick up and drop off my kids from school.
However, when my kids are home from school (say, during spring break), they often attempt to come into the spare bedroom that serves as my office (because it’s also their playroom and has a bunch of their toys in it). This is a familiar scene: I’ll be on a video call attempting to pay attention to something someone on the call is saying, when the door begins creaking open, and someone timidly peeks their head in and asks if I’m on a call… which I can’t really respond to, because I am on a call.
It’d be nice if I had a way I could indicate whether or not I was on a call outside the office room I’m in so they can tell without needing to open the door.
Option 1: Switch-based
There are a lot of options available for these sorts of “on air” lights that recording studios use. However, there don’t really seem to be any “smart” options.
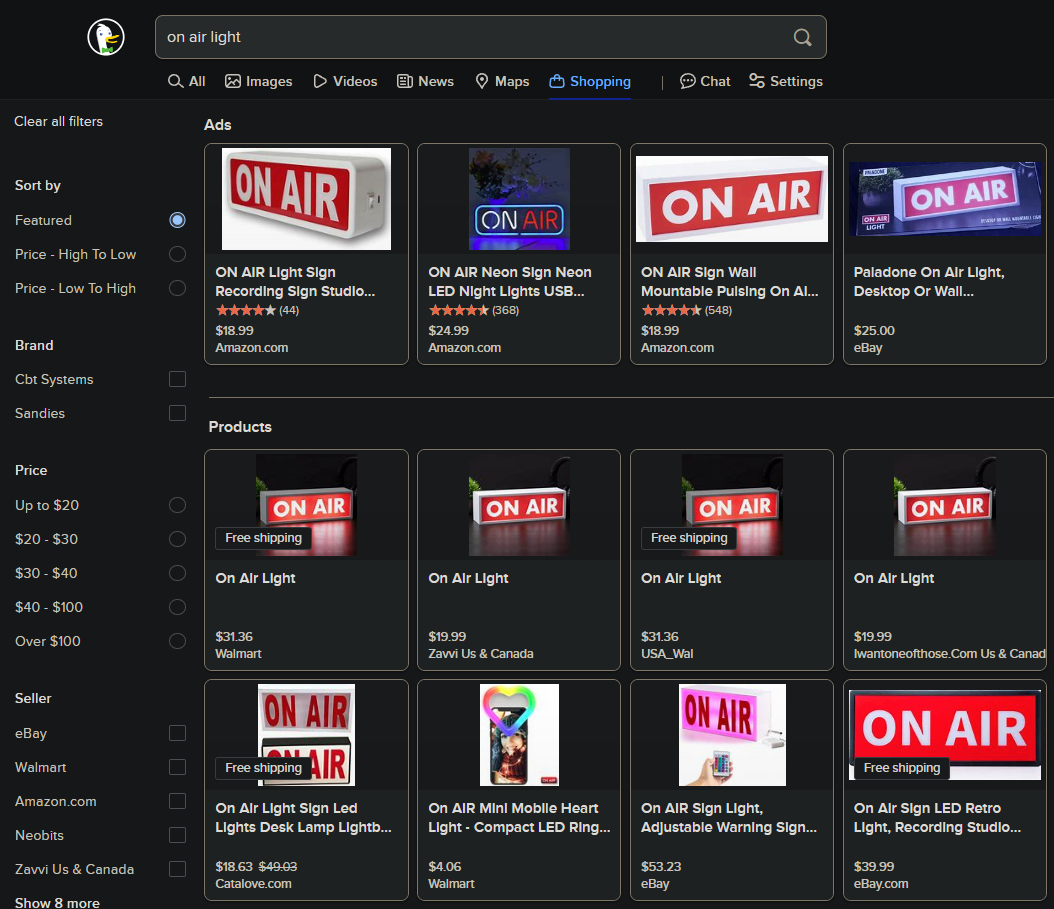
Some come with switches or remotes, but I think going with a manual switch or remote based option would mean I would frequently forget to turn it on (or off). I also don’t want to run a wired switch from my computer desk to the hallway outside the room. I would be nice if it just came on automatically whenever I’m on a call.
Option 2: Calendar-based
I found a few articles about creating an indicator light based off calendar events. However, that also seems fairly unreliable to me; if you’re in an ad-hoc meeting that doesn’t have a corresponding calendar invite (say, pair programming or responding to an outage), it’s not going to light up.
This method also seems fairly ad-hoc in terms of needing to run a set of custom scripts based off your calendar URL. I wanted something a little more robust.
Option 3: Home Assistant
I do have a spare Raspberry Pi in my basement running Home Assistant, which I mostly set up to tinker with and then forgot about. It’s not really doing anything. It’d be nice if I could use that to drive the light’s status, as that seems to be pretty much exactly the sort of thing Home Assistant is designed to do.
The question then is how to alert Home Assistant when I’m on a call? It doesn’t really “see” my Windows-based computer by default in order to know whether I’m on a call or not.
Luckily, there’s a really great “agent” application for Windows called HASS.Agent which will install as a Windows service (so the operating system will always ensure it stays running in the background), and enables you to configure a suite of “sensors” on your machine that will report their status to Home Assistant.
Setting Up MQTT in Home Assistant
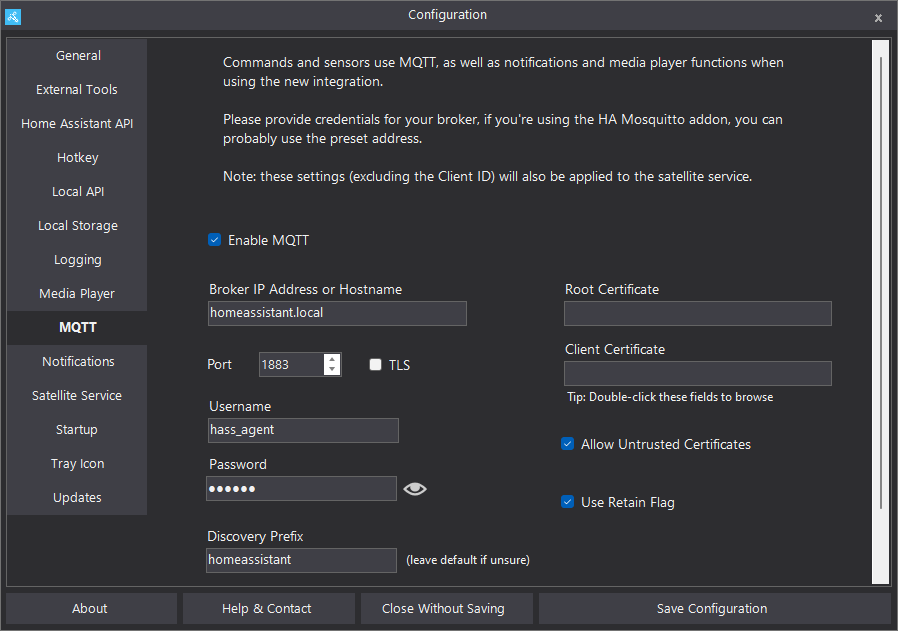
In order for HASS.Agent to communicate with Home Assistant, you first need to add the Mosquitto MQTT broker add-on to your Home Assistant instance, which you can do by going to Settings -> Add-ons -> Mosquitto Broker and clicking the Install button. MQTT is a standard message queue protocol that enables services to publish events to Home Assistant in an asynchronous manner.
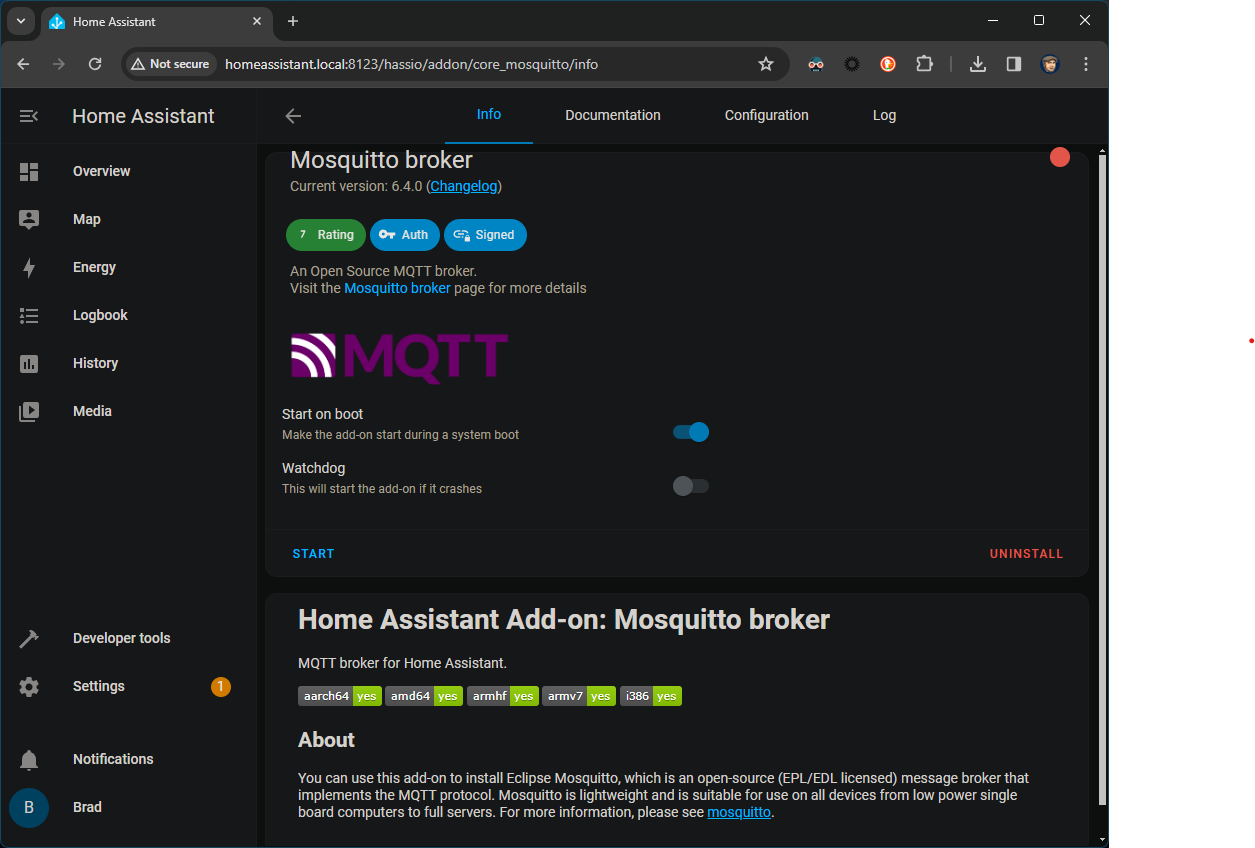
Once the Mosquitto broker is installed, there are still a few more steps to configure so that HASS.Agent can connect to it. First, check the “Watchdog” option, so Home Assistant will automatically restart the add-on if it crashes. then click the Start button.
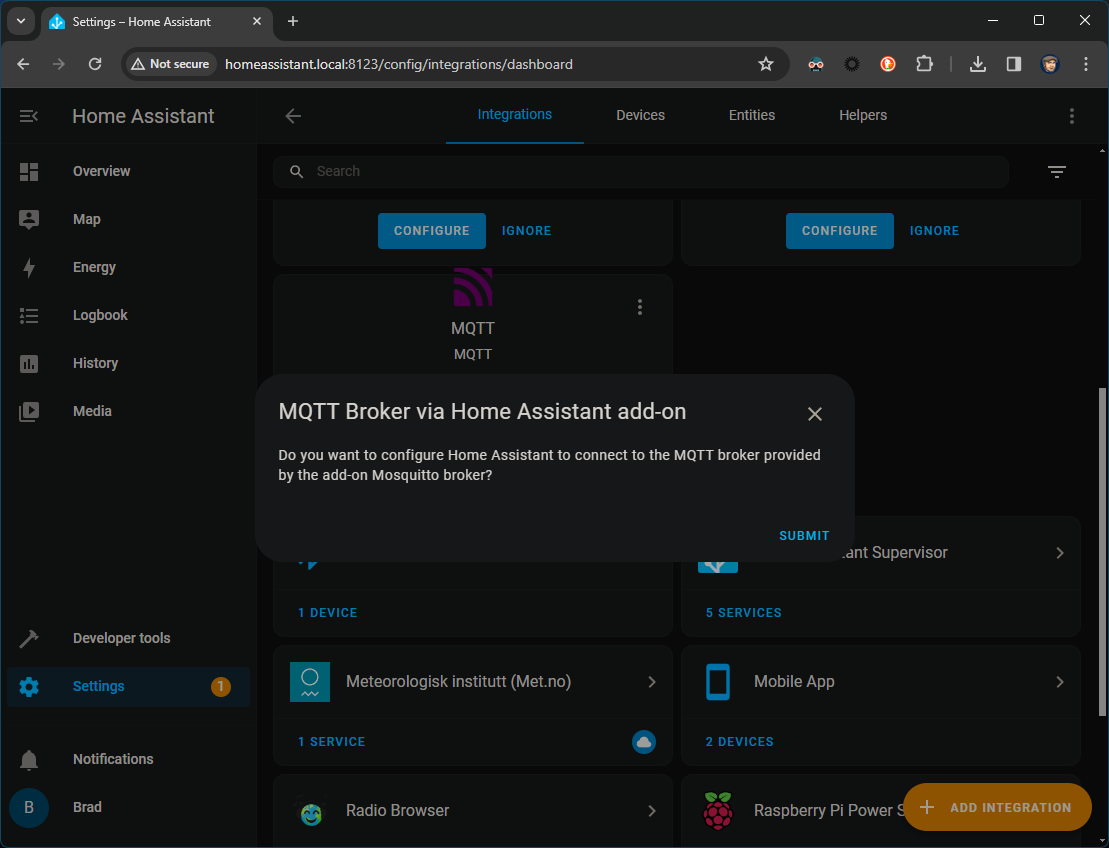
There’s still one more step to actually allow services to talk to Home Assistant via MQTT. This one is easy to miss. Now that the MQTT service is running, go to Settings -> Devices & Services -> MQTT -> Configure.
I overlooked this step and it took me a while to figure out why HASS.Agent was not able to communicate with Home Assistant, so make sure you don’t skip it.
Setting up HASS.Agent
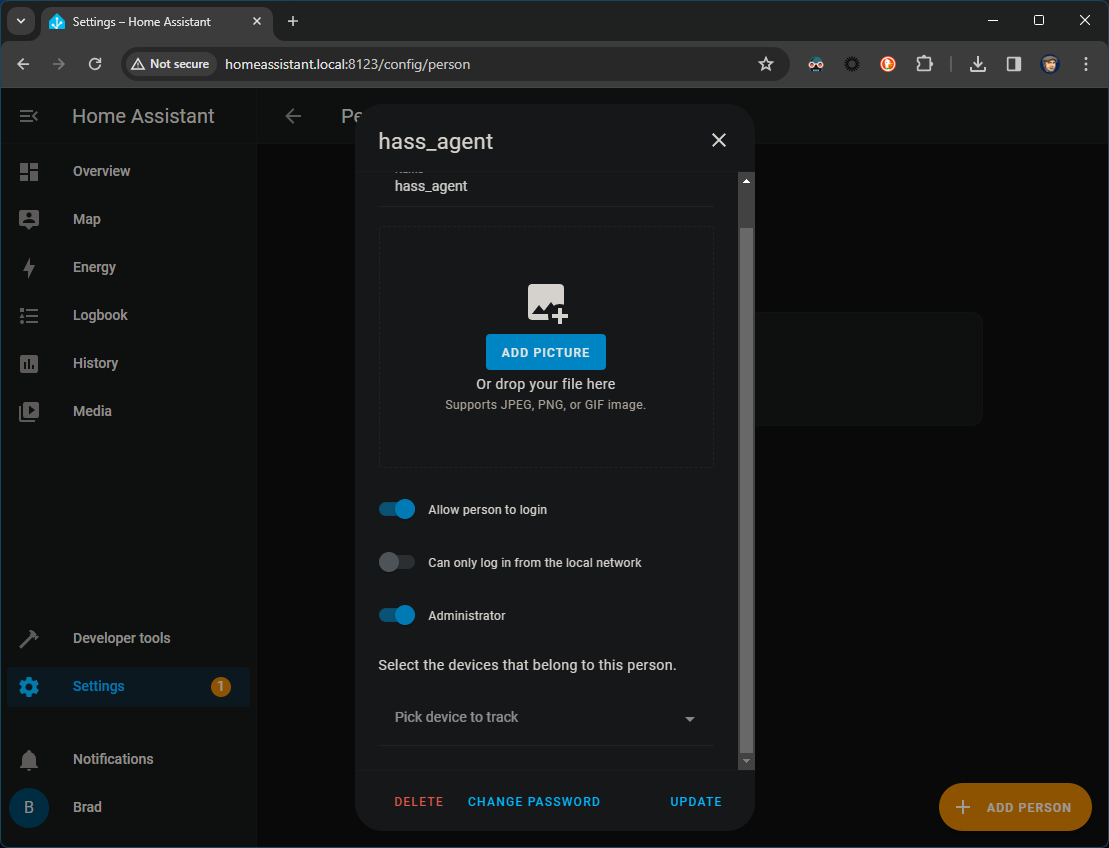
Now that MQTT is running in the Home Assistant instance, we can actually set up HASS.Agent. First, you might want to create a user in Home Assistant for HASS.Agent to use when communicating with your instance. You can do this by going to Settings -> People -> Add Person and then creating a new user with a password of your choosing. I named mine hass_agent:
With that done, we can now run the HASS.Agent installer and step through the handy setup wizard. HASS.Agent has a bunch of capabilities for letting Home Assistant control your Windows machine and use it as a media player, etc. For my purposes, I don’t really plan on using any of that. I just want to expose some “sensors” from my machine to Home Assistant so that I can create triggers based off of them.
So, I left the Local API and Satellite Service options in HASS.Agent disabled. The main thing you want to ensure is that you configure the MQTT settings using the user account credentials we just created above.
Creating Sensors
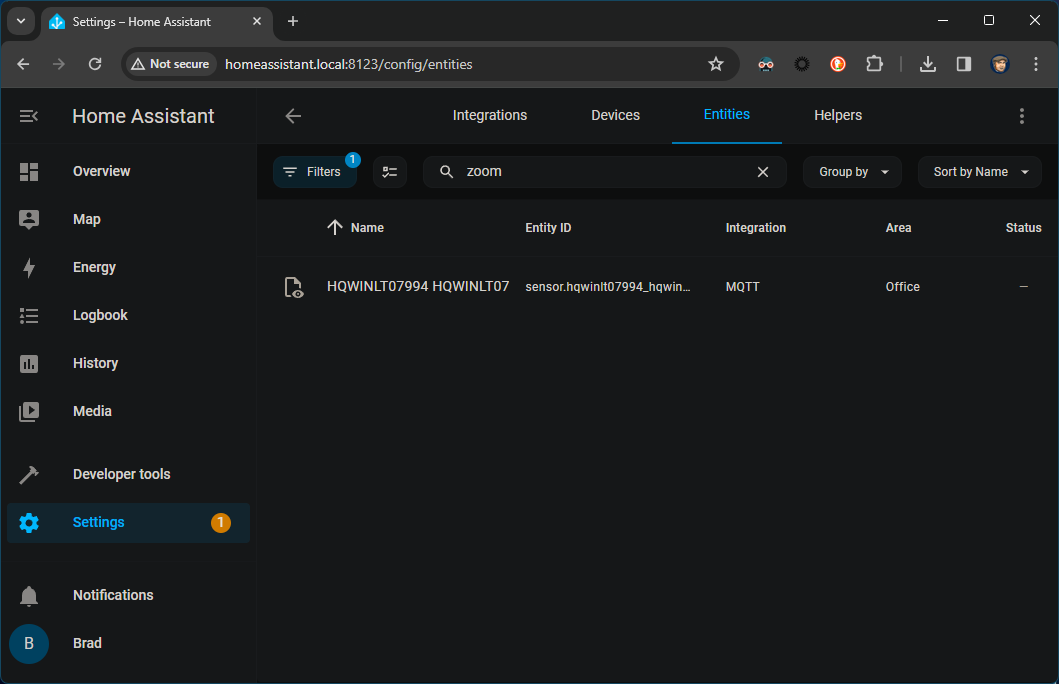
Once HASS.Agent is installed and configured to talk to your Home Assistant instance, you can create some sensors. Originally, I was thinking I could trigger the light off of the status of my webcam. HASS.Agent does include a “WebcamActive” sensor which would work for this method. It also has a “MicrophoneActive” sensor which would work if you’re more of a voice-only meeting person.
However, those still won’t capture the situation where you’re on a work call but have your camera off and microphone muted (say, if you’re listening in to a big all-hands meeting). If you still want to capture those, we can use the “ProcessActive” sensor.
In order to do that, we need to identify a process that only runs when actively on a call. Luckily, that’s just the case with Zoom (which is what my work currently uses for remote video calls).
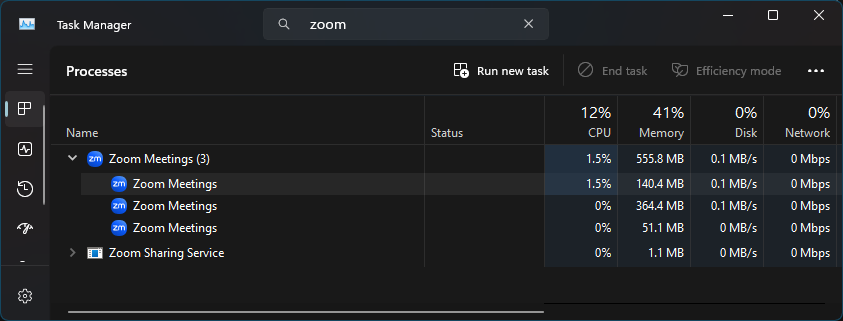
The above screenshot shows the Zoom processes that run all the time, even when you’re not on a call. This is just the zoom idle process that gives you meeting reminders and such. Obviously we can’t use that process for the sensor, because you’d appear to always be on a call whenever the computer is on.
However, compare the above to the same screenshot when a call is active (my camera and microphone were both inactive when capturing this screenshot):
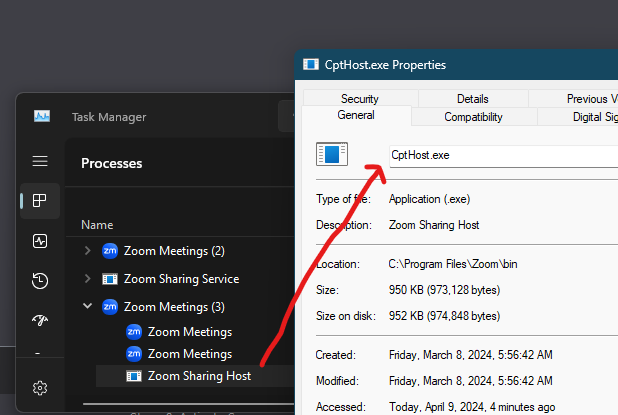
So, it appears we can base our ProcessActive sensor off of cpthost.exe, which only runs when actually on a call (as opposed to zoom.exe, which is just running all the time).
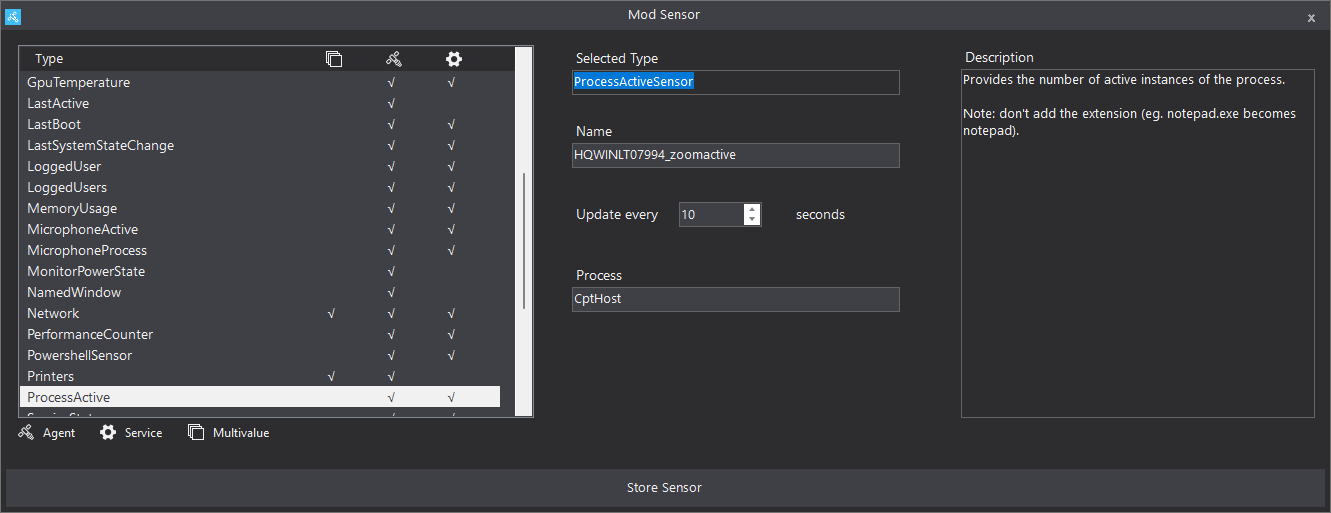
Note the description in the HASS.Agent configuration window says to omit the
.exeextension from the process name, so here I’m just enteringCptHostas the process to monitor.
Once configured, you can click “Store Sensor” and then “Store and Activate Sensors,” which will actually send the sensor to Home Assistant.
Back in Home Assistant, you should now see your new sensor under Settings -> Devices & Services -> Entities. You may need to restart Home Assistant for it to notice the new sensor.
Now that it’s here, we can create automations based on it!
Creating Automations
Head over to Settings -> Automations in Home Assistant, and we should be able to set up the automations for our new sensors.
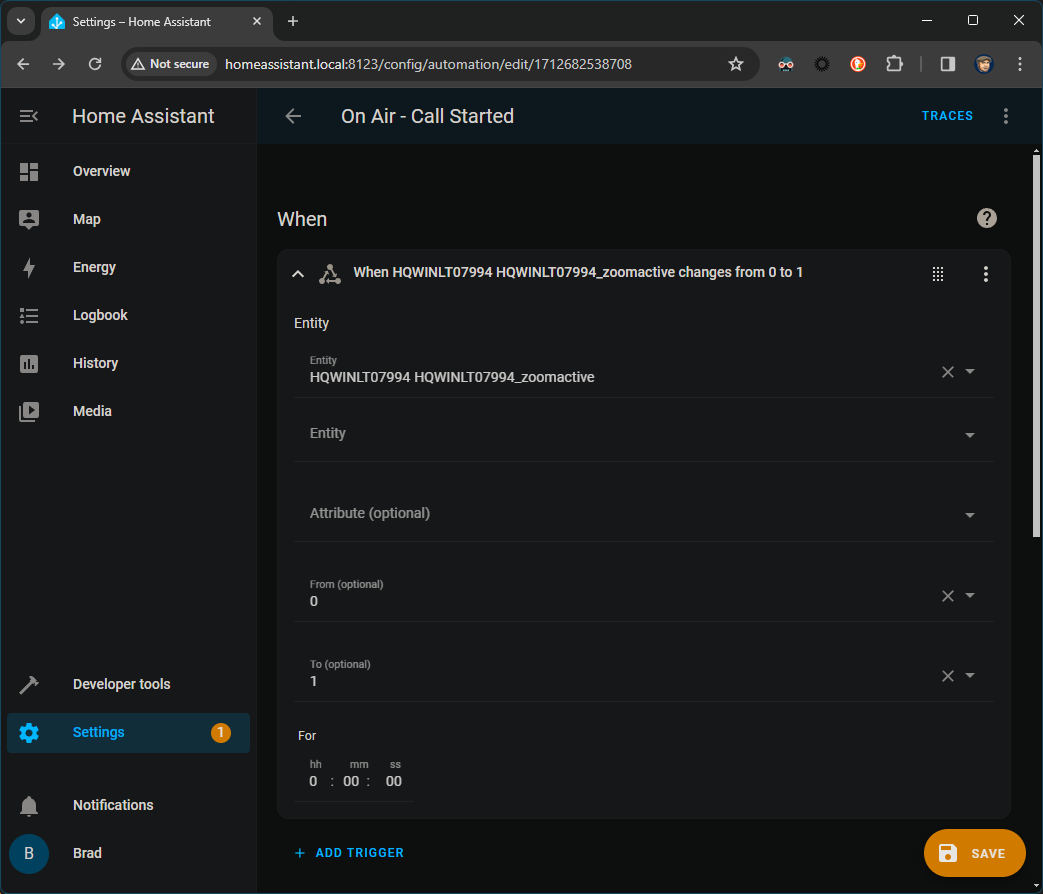
We’ll create two automations: one to turn the “On Air” light on when a call starts, and one to turn it back off when a call ends.
First, the call start trigger. Hit Create Automation and then Create New Automation, and then Add Trigger. Our “ZoomActive” sensor is an “Entity” in Home Assistant speak, so we want to use an Entity State trigger for our automation. When the HASS.Agent “ZoomActive” sensor sees the watched process start, the value goes from 0 to 1, so that’s how we’ll configure the trigger.
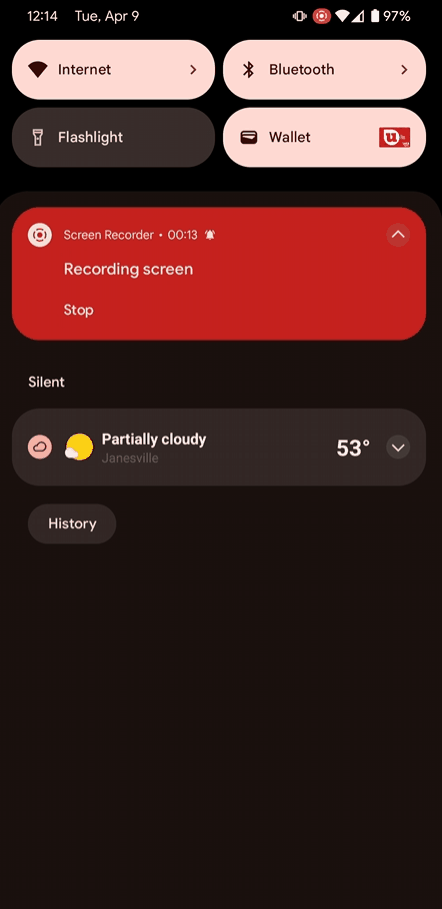
I don’t actually have an On Air light installed yet, so for now I’m just going to configure the action for the automation to send a notification to the Home Assistant app on my phone, to prove that it works. To do that, I created a Device action.
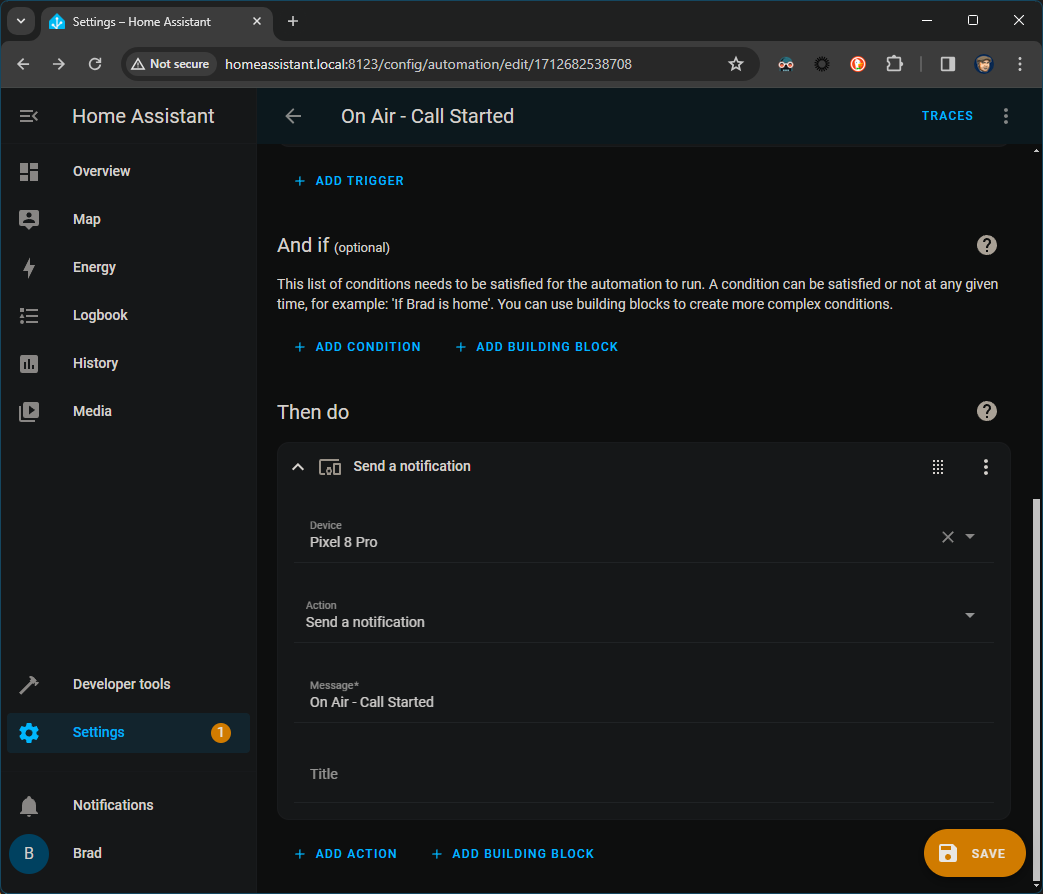
Now if I start a Zoom call on my computer, I should get a notification on my phone that a call has started.
To create the “Call Ended” automation, I created another automation with the opposite Entity State trigger - when the ZoomActive sensor’s value goes from 1 back to 0.
To Be Continued
Now we’ve got a sensor that tells Home Assistant when we’re on a call, and an automation that can trigger an action based off of the sensor’s value. I’ll cover actually connecting the automation to an IoT-connected smart light in Part 2.