In part 1, I covered setting up Home Assistant and HASS.Agent, so that I could trigger automations based on Zoom calls starting and ending on my PC. But for now, I just have the automation sending a notification to the Home Assistant app on my phone. In this part, I’ll cover actually connecting it to an IoT-connected smart bulb.
Choosing a Bulb
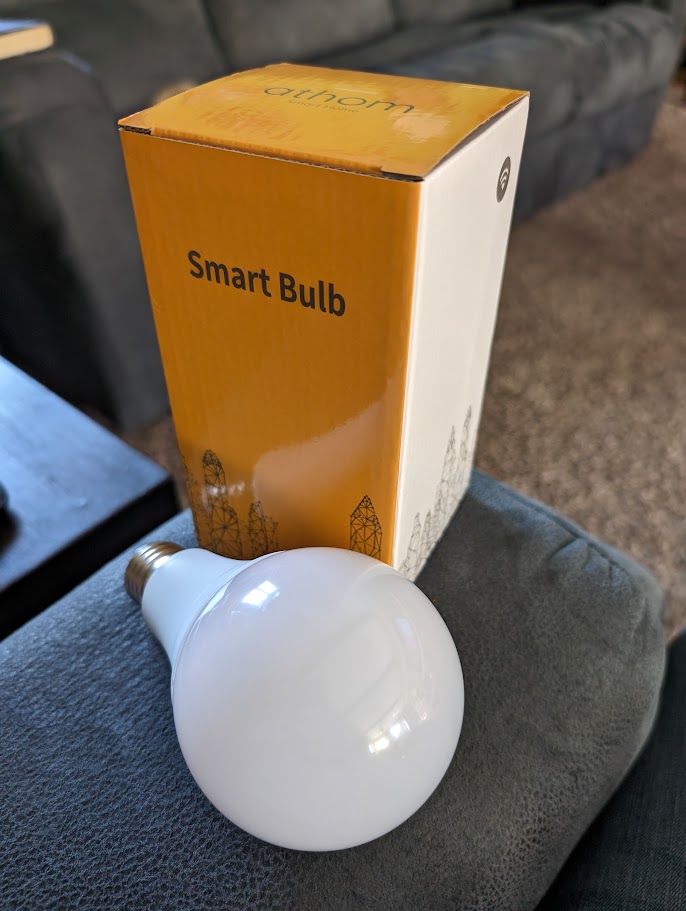
After doing some research about which smart LED bulbs work well with Home Assistant, I settled on an Athom WLED 15W Color LED. This will fit in my existing light fixture, and Home Assistant has a built-in connector for communicating with WLED bulbs.
There were some snags with getting the bulb to pair well with Home Assistant, so another manufacturer might be better. I was able to get it working after a little trial and error, however.
Setting up the Bulb
The order of operations here matters, because you need the bulb to be set up and have the presets you want to use loaded before you connect it to Home Assistant. If you do it in that order, Home Assistant will automatically pick up the device’s presets and you’ll be much better off.
First, you need to connect the bulb to Wifi. There’s a WLED app, I just installed that on my phone and then connected to the bulb’s WiFi network and used the app’s “detect devices” feature to find the bulb. Once you’ve done that, you can go to the WiFi Setup tab in the app and give the bulb the SSID and password to connect to your home WiFi network.
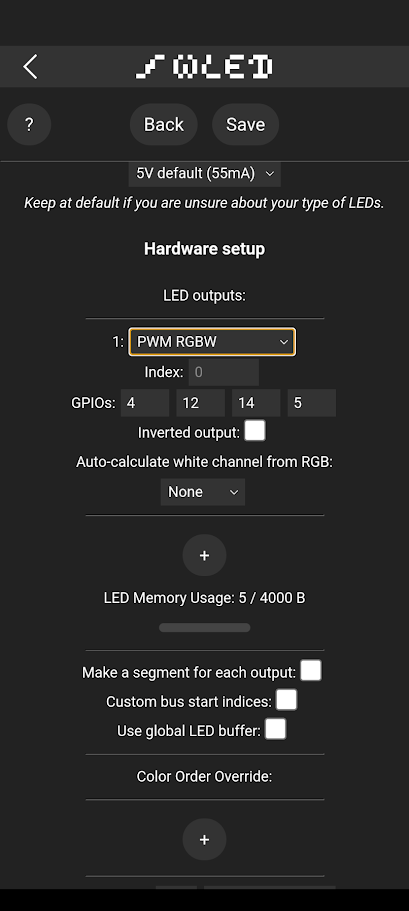
Home Assistant’s WLED plugin doesn’t support White Balance correction (CCT) mode, so you’ll save yourself some trouble here if you go to Config -> LED Preferences in the WLED app and change the LED Outputs setting to “PWM RGBW” instead of the default of “PWM CCT”, and also make sure the “White Balance Correction” checkbox is unchecked under the “White Management” section.
If you’ve got the same device as me, you want to set the GPIO options to: 4, 12, 14, and 5 (the correct values for these took some sleuthing to discover).
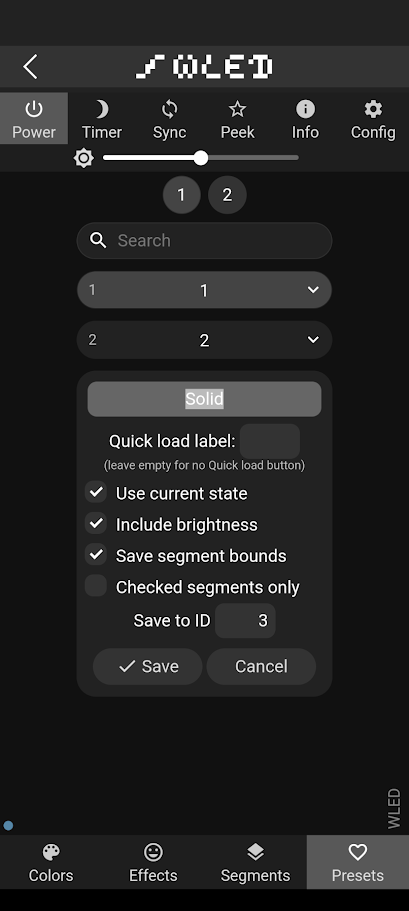
Creating Presets
Once you’ve got the bulb connected to your WiFi and using the right output mode, you can create some presets. First, use the color wheel on the main screen for the device to get the color how you want it. Then, toggle over to the “Presets” tab and hit the create button, and you can save the device’s current state as a preset.
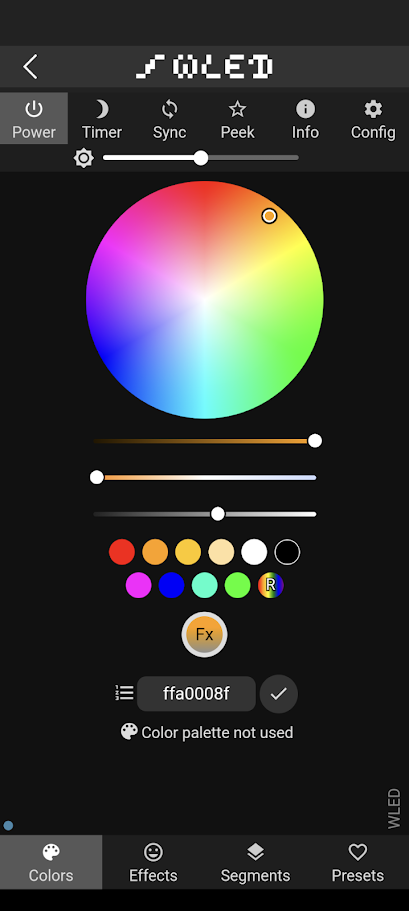
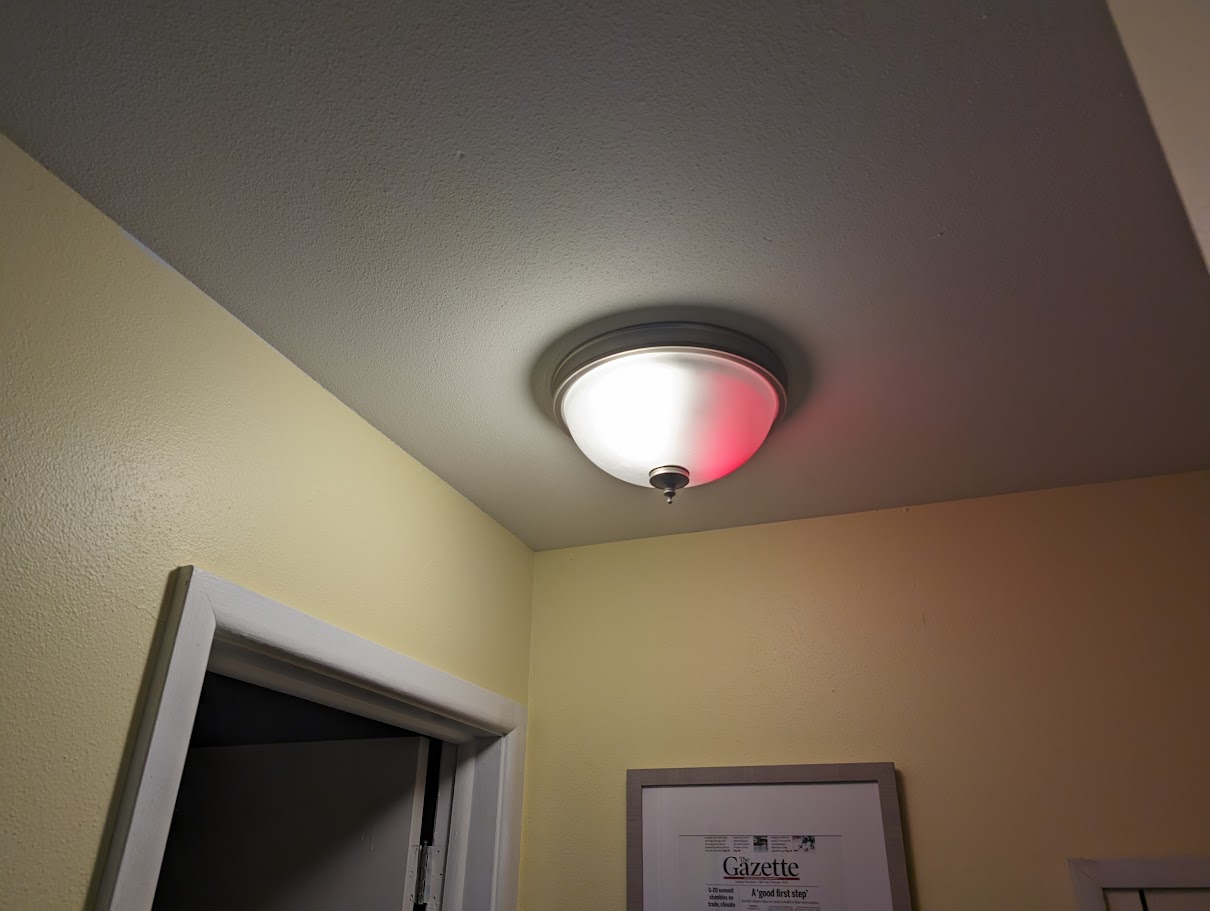
For my purposes, I created two presets: a “normal” one for the default state when not on a call. I tried to match the “soft white” color of my existing non-smart LED bulbs in the area for this. Then, I created a second preset for when I’m on a call, which is bright red.
Home Assistant Setup
Now that we’ve got the smart bulb all set up and configured, we can add it to Home Assistant and use it in our automations!
One thing I’ve noticed with Home Assistant is you often have to restart it in order for it to notice new devices on the network, so let’s do that first, by going to Settings -> Click the “…” button in the upper-right corner -> Restart Home Assistant.
Once Home Assistant has restarted and come back online, go to Settings -> Devices & Services -> Devices and click Add Device. Type in “WLED” in the search box and then click add.
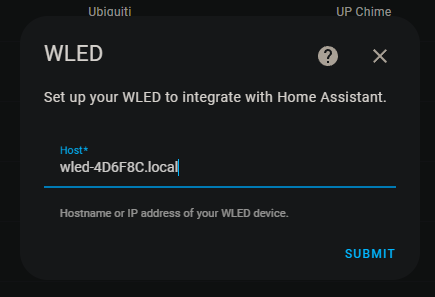
Here, you’ll either need to enter the bulb’s IP address (I’d suggest giving it a static IP on your network if you go this route), or the hostname of the device. You can actually configure the bulb’s hostname in the “Wifi Preferences” screen of the WLED app, but mine defaulted to wled-4D6F8C.local, so I just used that. This way if the bulb gets assigned a different IP address in the future, it won’t break the Home Assistant integration.
Note: If you left the device in CCT mode, this is where Home Assistant will give an error like “WLED Device ‘xxxx’ has a CCT channel, which is not supported by this integration’, so if you get that, make sure you change the LED mode in the bulb’s preferences in the WLED app and then try again.
Automation Configuration
Now that we’ve got the bulb added to Home Assistant, we can use it as a target for the Call Started and Call Ended automations we created in Part 1.
Just go back to Settings -> Automations & Scenes in Home Assistant and edit the call started notification, but add an new “Device” action and choose WLED as the device. Then for the ‘Action’, choose “Change WLED Preset option” and pick the preset you want to use for your “on call” status.
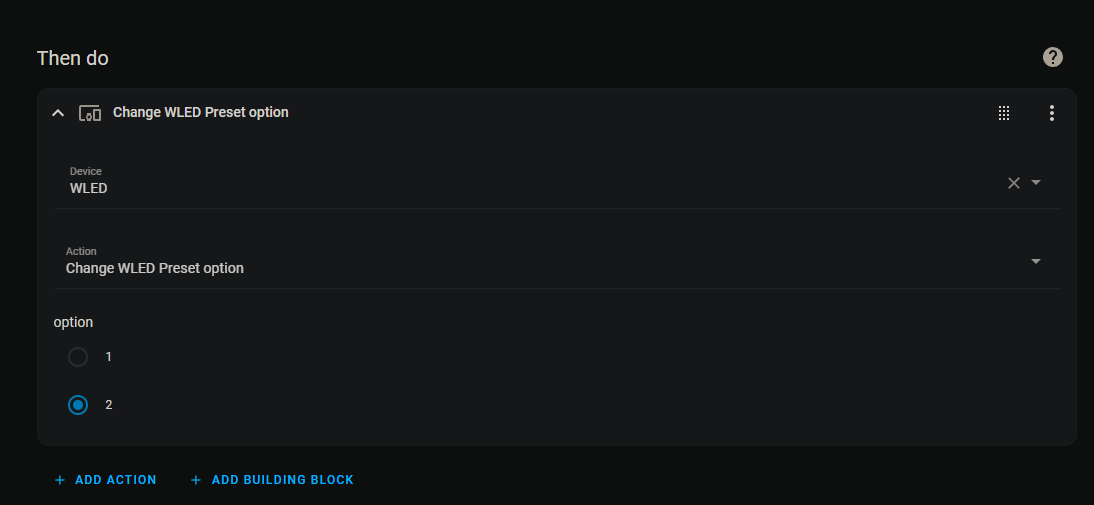
Note: This is where I ran into a bit of trouble on my initial attempt to set up the trigger. If you haven’t already saved the presets on the bulb, and then reset Home Assistant, it won’t pick up the preset options, and you won’t have any options available to choose as the preset to change to. So create the presets on the bulb first, then restart Home Assistant, then configure the automation.
Now just do the opposite for the “Zoom Call Ended” automation and choose the “normal” preset for the light.
Here’s what the YAML configuration for my two automations looks like:
Zoom Call Started:
alias: Zoom Call Started
description: ""
trigger:
  - platform: numeric_state
    entity_id:
      - sensor.hqwinlt07994_hqwinlt07994_zoomactive
    above: 0.9
condition: []
action:
  - device_id: 745c96c15843a9c4a928ea3f44e92c6b
    domain: select
    entity_id: f1270db19b2d6887fec3dc92e297d0f4
    type: select_option
    option: "2"
mode: single
Zoom Call Ended:
alias: Zoom Call Ended
description: ""
trigger:
  - platform: numeric_state
    entity_id:
      - sensor.hqwinlt07994_hqwinlt07994_zoomactive
    below: 0.1
condition: []
action:
  - device_id: 745c96c15843a9c4a928ea3f44e92c6b
    domain: select
    entity_id: f1270db19b2d6887fec3dc92e297d0f4
    type: select_option
    option: "1"
mode: single

Other Considerations
I’m just putting the smart bulb in an existing hallway light fixture, which is connected to a three-way switch system. So, what happens if the light is turned off and then back on via the switch? I want it to check whether I’m on a Zoom call or not and set itself to the appropriate preset when it first comes online.
There are a couple of triggers that seem appropriate for this, but I didn’t have any luck with the “WLED Turned On” device trigger (I suspect there’s some sort of race condition where this event fires too early on power-up, before the device is ready to receive preset changes). So I ended up setting up a pair of “entity” triggers in Home Assistant, using the WLED Estimated Current Change sensor as a trigger. This seems to also fire when the bulb is turned on, but late enough in the device’s boot-up process that it can accept preset changes.
Here’s the YAML for those two automations:
WLED Turned On - Zoom Inactive
When the device powers on, but Zoom is inactive, I want to set the bulb to the “normal” preset, which I named “1”.
alias: WLED Turned On - Zoom Inactive
description: ""
trigger:
  - platform: state
    entity_id:
      - sensor.wled_estimated_current
condition:
  - condition: or
    conditions:
      - condition: state
        entity_id: sensor.hqwinlt07994_hqwinlt07994_zoomactive
        state: unavailable
      - condition: state
        entity_id: sensor.hqwinlt07994_hqwinlt07994_zoomactive
        state: unknown
      - condition: numeric_state
        entity_id: sensor.hqwinlt07994_hqwinlt07994_zoomactive
        below: 0.1
action:
  - device_id: 745c96c15843a9c4a928ea3f44e92c6b
    domain: select
    entity_id: f1270db19b2d6887fec3dc92e297d0f4
    type: select_option
    option: "1"
mode: single
Note: I used a “building block” with or logic to handle multiple states of the Zoom Active sensor from HASS.Agent. If the computer is asleep or turned off, the sensor will be unavailable and the automation won’t be able to get the numeric state of the sensor, so using the “or” logic ensures that all three states are covered: the sensor is unavailable, unknown, or known but in the “inactive” state.
WLED Turned On - Zoom Active
When the device powers on, and Zoom is active, I want to set the bulb to the “on call” preset, which I named “2”.
alias: WLED Turned On - Zoom Active
description: ""
trigger:
  - platform: state
    entity_id:
      - sensor.wled_estimated_current
condition:
  - condition: or
    conditions:
      - condition: numeric_state
        entity_id: sensor.hqwinlt07994_hqwinlt07994_zoomactive
        above: 0.9
action:
  - device_id: 745c96c15843a9c4a928ea3f44e92c6b
    domain: select
    entity_id: f1270db19b2d6887fec3dc92e297d0f4
    type: select_option
    option: "2"
mode: single